
 The 1927 Alden Malabar Junior IMAGINE on the rocks in City Island , New York, during salvage operations after breaking her mooring cables during a violent early fall gale |
|
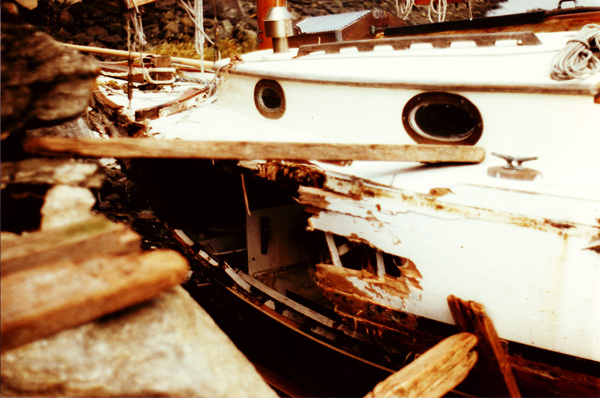 On the rocks, showing damage to
port side
|
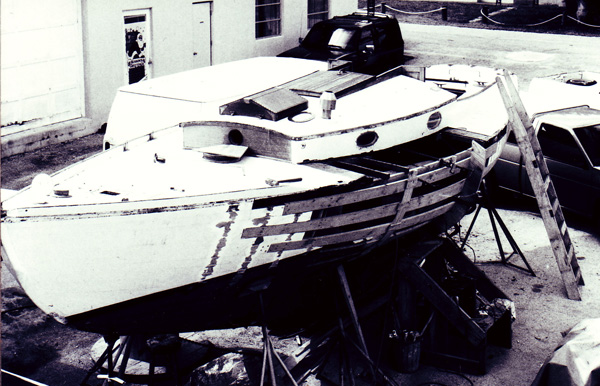
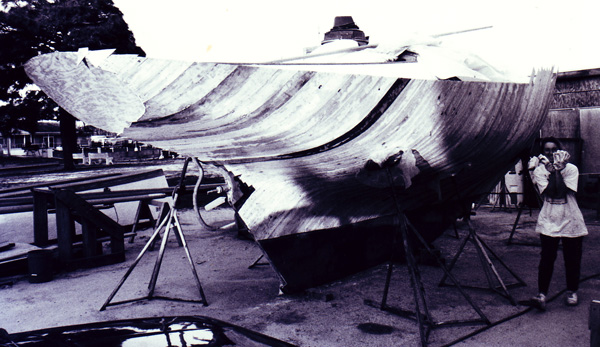
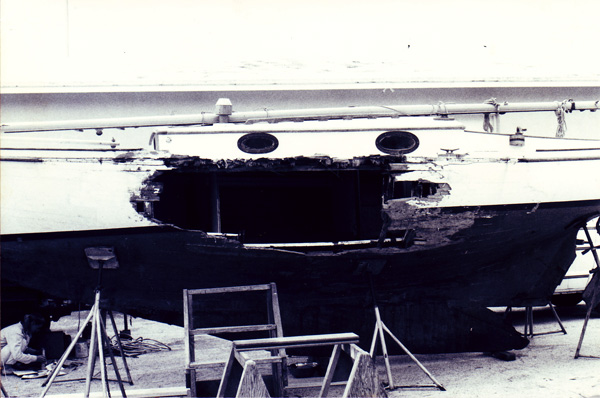 IMAGINE in our Port Salerno, FL yard after being trucked from NY |
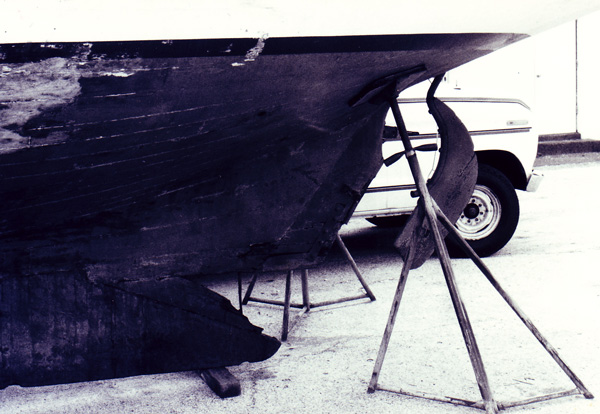 Damage to rudder & deadwood |
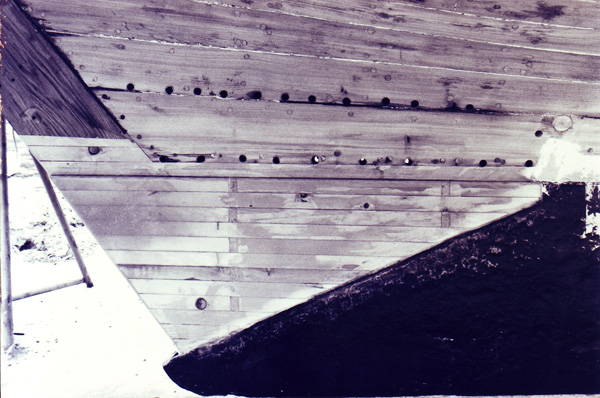
 Deadwood aft of ballast keel removed |
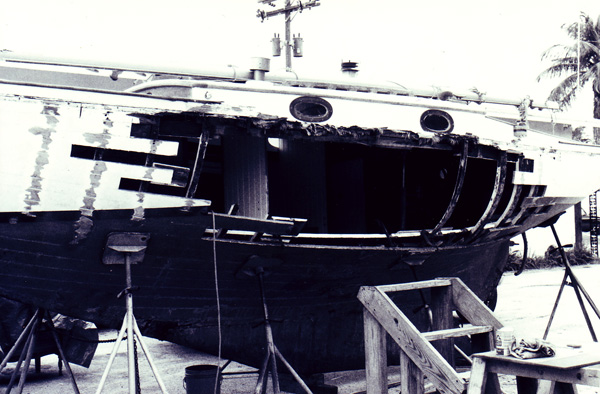 Damaged planks removed to expose frames that are intact |
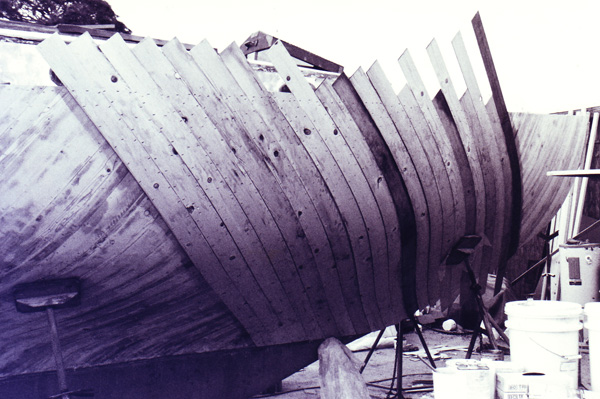
 New planks in place; Note the form (on right) taken from the opposite side to align planks and restore hull shape |
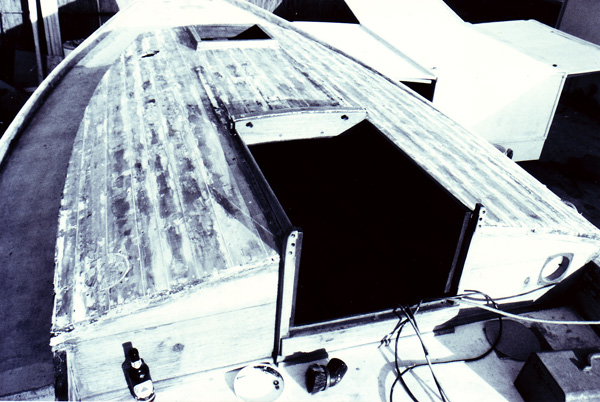
 View from above; careful measurements were taken to fair the new planks to re-create the hull shape to original. Damaged decking has also been removed and the sheer clamp has been replaced |
 The steam box using a hot water heater found along the roadside in the trash (it only needed a $10 heater element); I removed the thermostat in order to make steam |
 Oak frames ready to be steamed |
 Sliding hot frames into place using the new planks for correct shape & location (Bill Smith) |
 A new frame forced into place under the keelson alongside a floor timber |
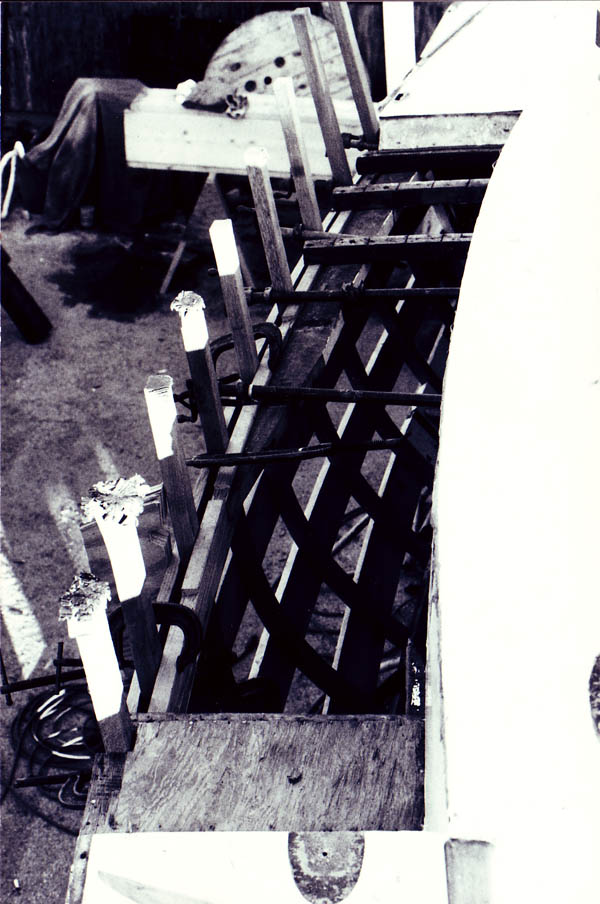 New white oak frames in position |
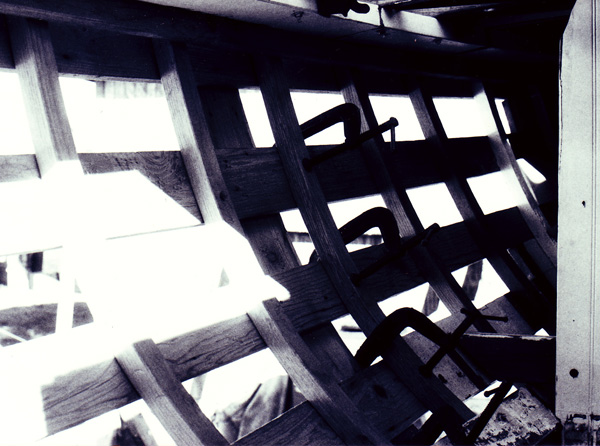 Hot frames are driven into place between plank & sheer clamp, under the keelson below, and are clamped to the new planks which are staggered (every other one) to allow clamp insertion |
 New frames being carefully aligned to eachother and the hull planking; Note the fasteners through the planks into the frames, both new and existing |
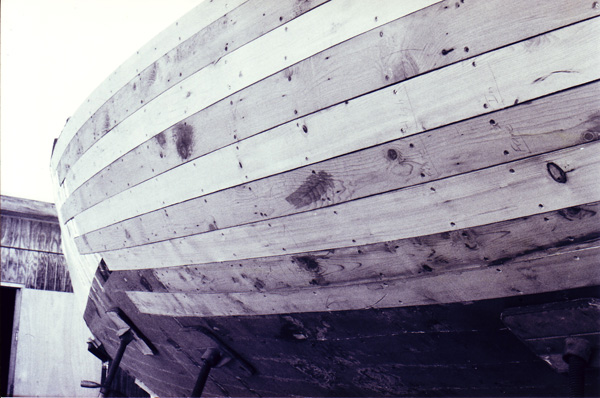 Next "shutter" planks are spiled and installed between the initial staggered planks. Even though we are cold-molding over the hull, the new planks are carefully fitted, caulked and seams paid |
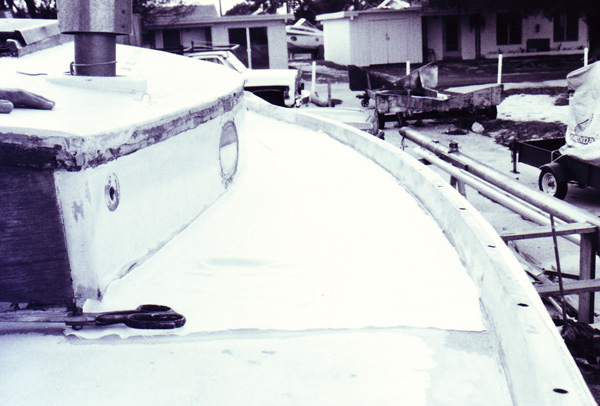
 The new sheer clamp segment is notched for deck beams and the beam shelf is repaired and thru-bolted in place |
 New white oak side deck beams in place; sheer strake installed and frames trimmed |
 The deck repaired; When we originally restored IMAGINE in 1981 we laid plywood decks covered with Xynole-polyester fabric and epoxy for strength, water-proof qualities and low maintenance |
 The gap aft of the lead ballast keel cleaned up and ready for laminating new deadwood (pieces) |
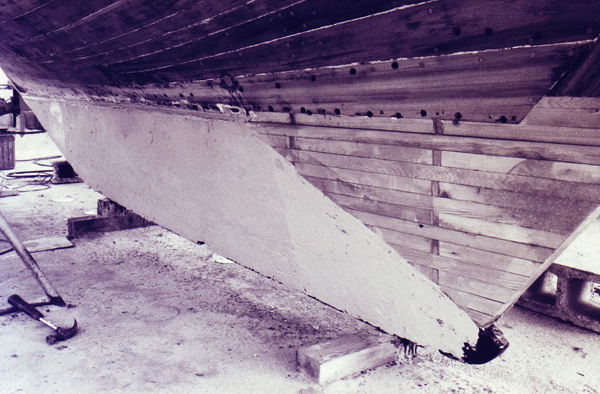
 The new epoxy-laminated deadwood; Note rabbet to allow for double-diagonal planking |
 Damage to the deadwood in front of the ballast |
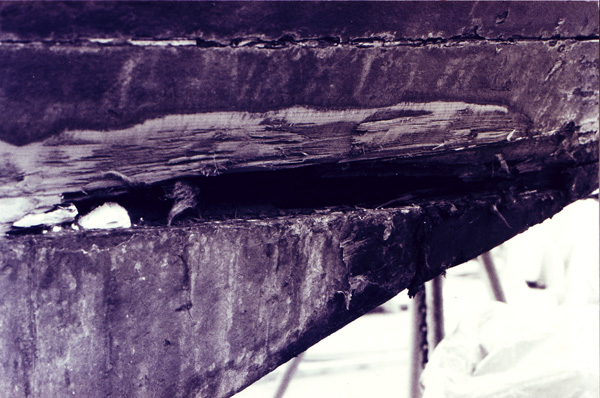 Damage viewed from the side |
 Using a hand-held power plane to fair new wood to old (Stem repair) |
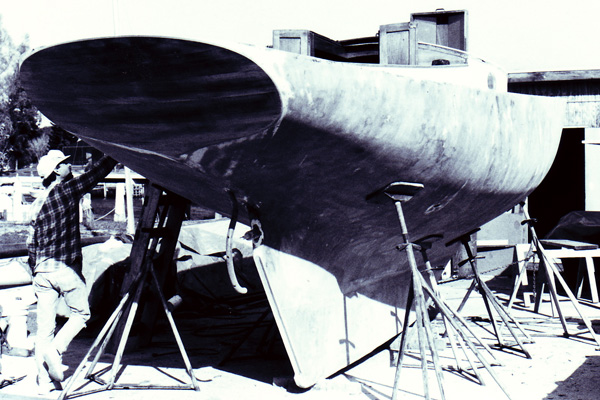
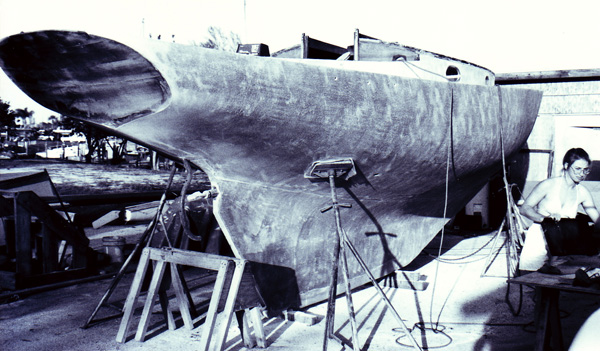
 After basic hull repairs were completed, we sand-blasted the entire hull to remove all paint and to provide us with a uniform surface for epoxy-gluing the new double-diagonal planking. We faired the hull further after sandblasting using hand-held power planes and low-speed body grinders with 8" soft pads with 40 grit paper followed by 60 grit paper |
 IMAGINE after sandblasting but prior to fairing, ready for cold-molded over-planking |
|
 Repairs to stem and keel deadwood forward |
 Replacing fasteners from garboard plank into keel & keelson after rabetting for new planking |
 The deadwood, keel & keelson aft contained excessive moisture, dried out by drilling holes |
 The lead ballast was faired using epoxy compound after sandblasting |
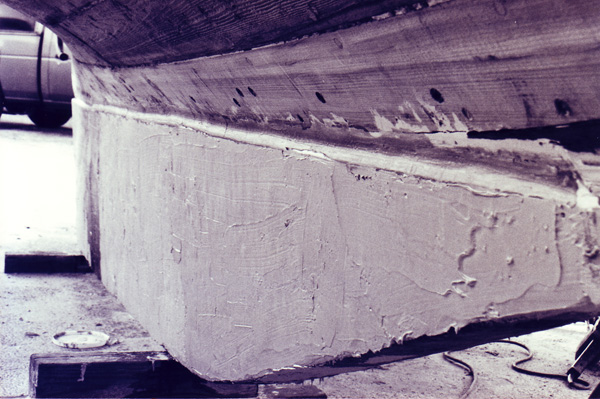 The epoxy-faired lead ballast, view from forward, before sanding, showing rabbeted garboard |
 Butt-blocks were replaced or refastened as necessary, and caulking & seam compound replaced |
 A heavy layer of fiberglass
roving was epoxied over the ballast and above three planks or more;
This was to integrate the hull/keel components prior to the cold-molded
diagonal planking
|
 The glass roving seen from forward; The roving was carefully laid up into the garboard rabbet such that when the diagonal planking laminates are installed the keel and hull will be structurally integrated |
 The fir diagonal planking has been ripped and planed to 1/4" thick after experimenting with flexibility |
 The first diagonal planking layer being epoxy glued and stapled in place; each plank-end is cut to fit in the garboard rabett; Staples are 7/16" crown cement coated/galvanized steel, and are left in place; Both mating surfaces are epoxy coated (4" roller) with a mix thickened using Cab-O-Sil |
 The starboard side planked, first layer |
 My third "wife" Beth holding fans of $100 bills which have just arrived from IMAGINE's owner Tony Bianco so that we can keep working! |
 Planks and staples in the problematic concave curve of the deadwood aft; This work ain't pretty--we often refer to planking in areas like this as "cabbage"--essentially vegetable filler |
 Planking in the bow |
 Diagonal planking into the rabetted garboard plank |
 The first diagonal layer on the starboard side trimmed off; Note the plywood overlay on the transom |
 Planking has been started on the port side (diagonal first layer)--mirror image to starboard |
 Diagonal planking in the concave area showing high density of staples: It is essential that the planking layers are tight to the hull, leaving no voids; Extra epoxy is used here |
 Both sides now have their first diagonal planking layer; The first layer on the stbd side has been sanded and faired smooth prior to starting the second diagonal planking layer |
 The second (and final) diagonal layer is started here; Note that we plank without spiling until "edge-set" becomes annoying, at which point we install a plank tapered on both sides and both ends, edge-setting the next plank to fit and continuing until opposite edge-set causes us to add another tapered plank. The double-tapered planks are made up in advance, and used when needed. It is important that planks lay tightly to the hull and don't "lift off" along one side due to too much edge-setting. |
 The second diagonal layer going on the stbd side; planks are staggered up & down to diminish edge-setting |
 Here the first diagonal layer on the port side is being epoxy faired prior to sanding in preparation to laying the second diagonal layer. Red microballoons are mixed with Cab-O-Sil into the epoxy resin |
 The deadwood area around the prop apperture required additional epoxy glazing and fairing |
 The view of the prop apperture from aft showing fairing compound |
 All planking is finished and we are fairing the hull prior to covering with Xynole-polyester cloth & epoxy |
 An overlay of teak planking has been laid on the transom |
 Wetting out Xynole-polyester cloth with thin epoxy (Shell Epon)--the funny hats are to keep epoxy out of our hair! Reuel Parker and Bill Smith; Beth Stevens is the "Glue Girl" |
|
 Preparing to fabric-cover the port side (Xynole hanging) |
 Fabric layers overlap eachother, passing under the keel and stem and up the other side; Monel staples hold the cloth in place prior to wet-out |
 Fabric/epoxy in the prop apperture and rudder slot |
 The hull is fabric/epoxy coated right up to the top of the toe rail; Fabric/epoxy will also be applied over the deck and toe rail, creating a seamless "boot" that will never leak. The coachroof and cabin trunks will also be fabric covered, overlapping the deck, and the cockpit will receive the same treatment, making the entire vessel waterproof from the outside. Finally, the inside of the hull in the bilge area must also be fabric/epoxy covered to prevent planking, keelson and deadwood from absorbing bilge water and swelling. Many cold-molded retrofits to plank-on-frame hulls go awry because fresh and salt water is allowed to gain ingress to the planking from inside. The hull planking should not be sealed or painted inside above the bilge area so that it can "breath" (release moisture), and the deck-to-hull joint must be absolutely waterproof! |
 IMAGINE's hull being faired with epoxy glazing compound prior to being coated with epoxy high-build primer (Sherwin Williams Tile Clad II high-build epoxy primer--no longer available); Beth Stevens on the right |
 Fabric/epoxy covering the deck |
 Peparing the coachroof for Xynole/epoxy covering; Bass Ale Rules!! |
 The faired and glazed hull inside ready for epoxy primers |
 IMAGINE has been moved inside for painting; Bob Tillotson to the right |
|
 Reuel is spraying Tile-Clad II high-build epoxy primer |
|
 White primer has been sprayed over the sanded high-build primer (topsides), and the boot stripe has been sprayed using linear polyurethane |
 Reuel spraying Sherwin Williams Polane HS linear polyurethane topcoat; As you can see, the hull is very fair! |
 Reuel Parker and Bill Smith, Port Salerno, Florida, 1989 (Beth Stevens photo) |
|