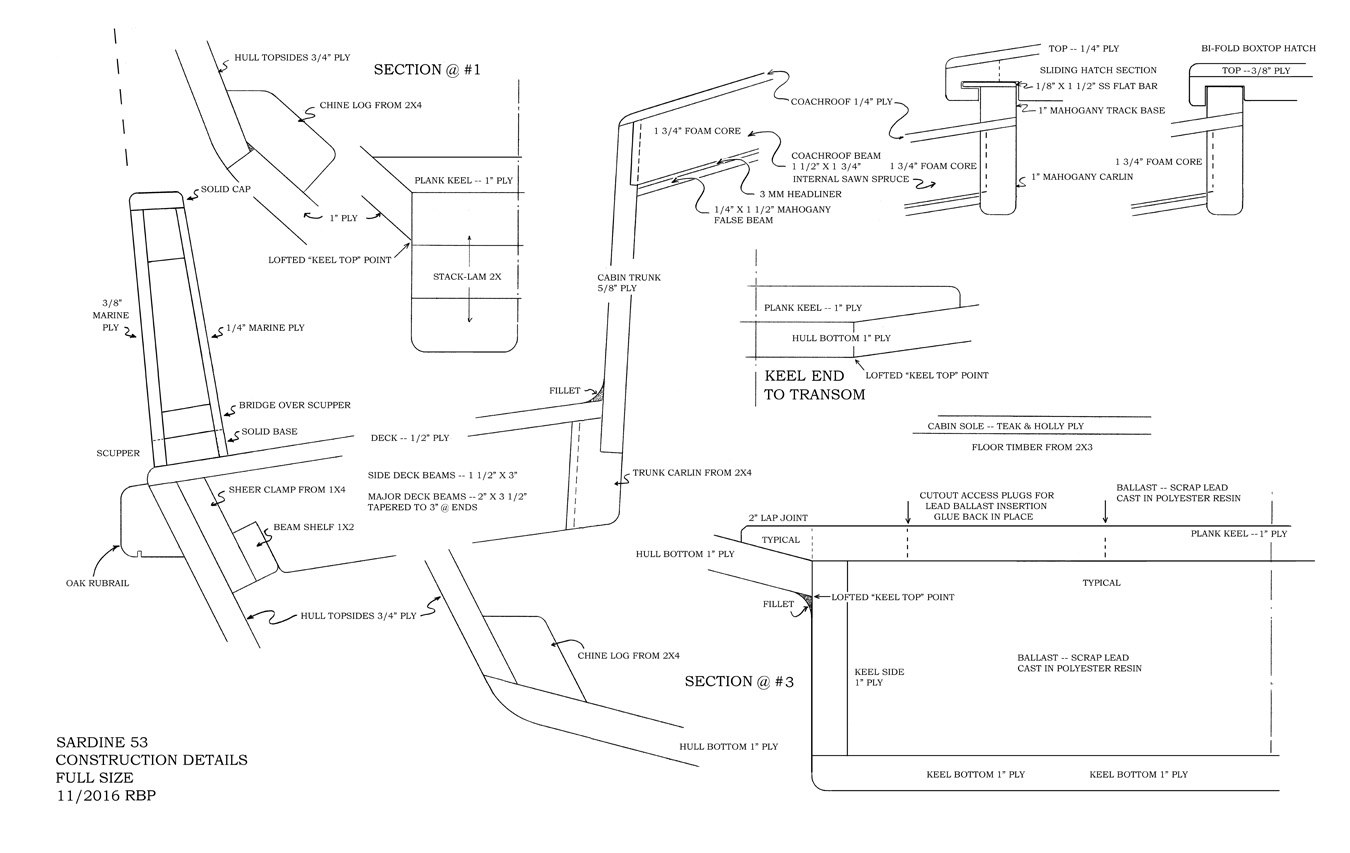
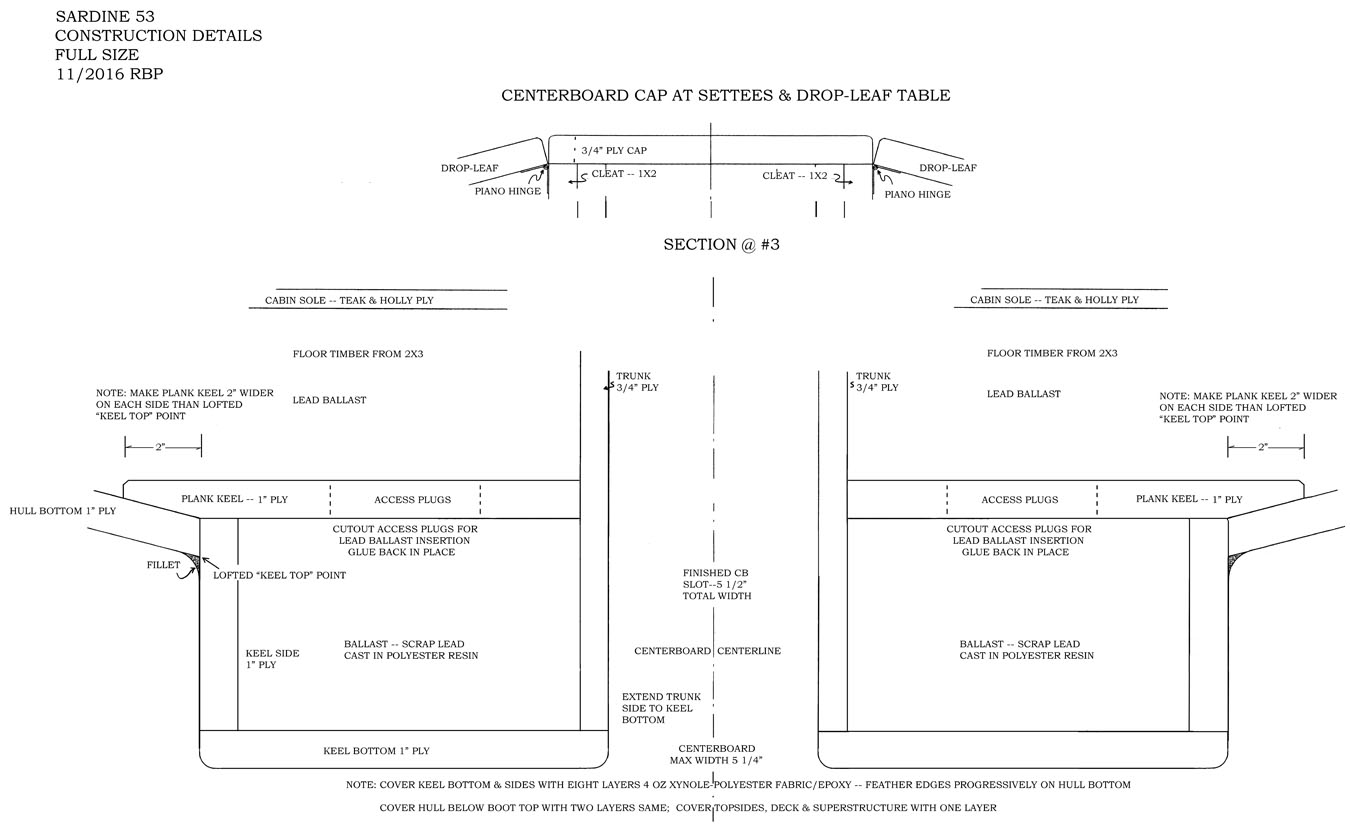
CONSTRUCTION PAGE -- SARDINE CARRIER 53 DEADRISE MOTORSAILER

SAIL PLAN FOR REUEL PARKER'S CRUISING RETIREMENT HOME

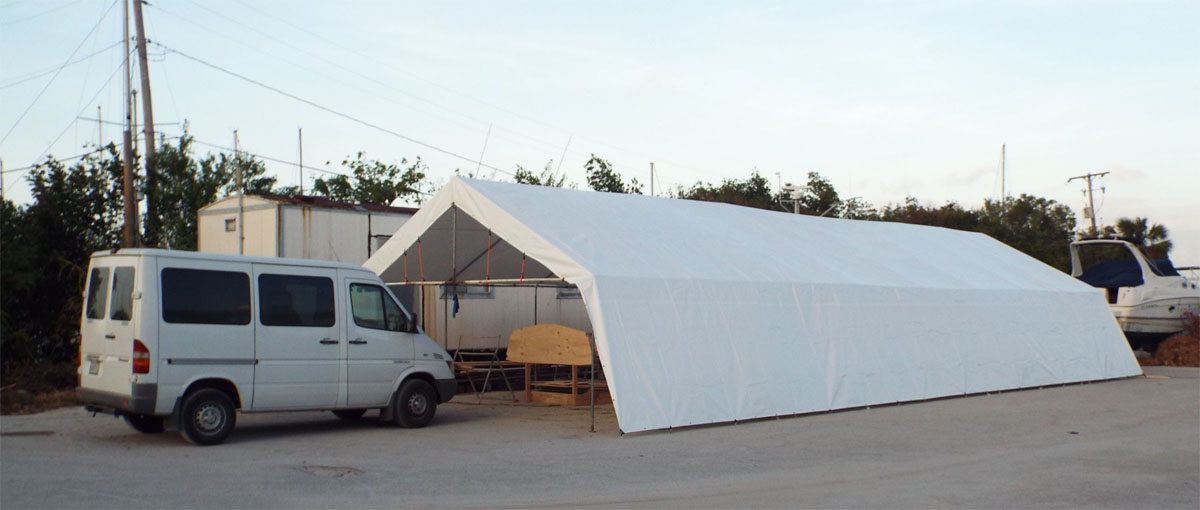
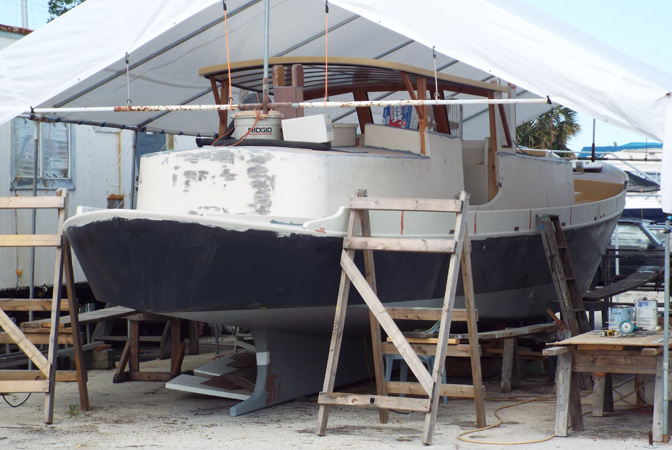
Parker Marine at Riverside Marina, in Ft. Pierce, FL--The big tent, December 2016
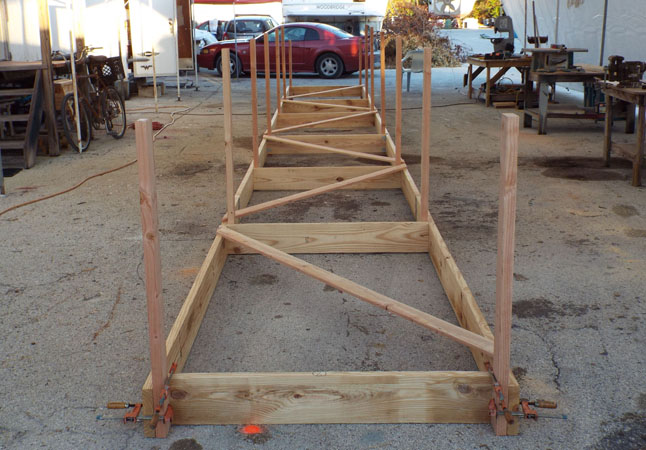
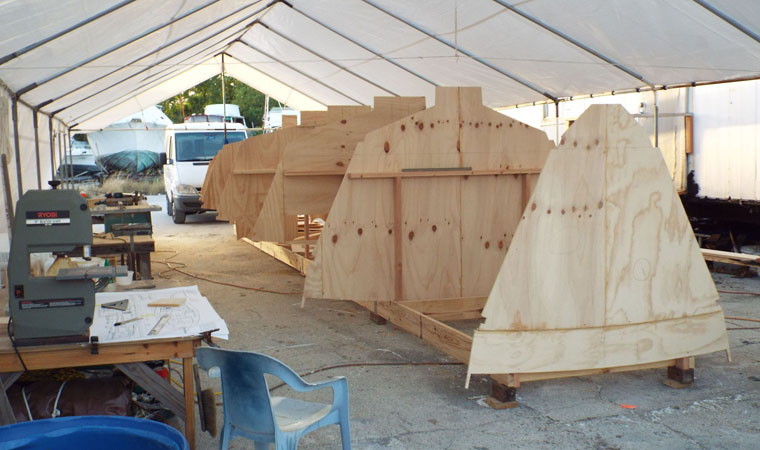
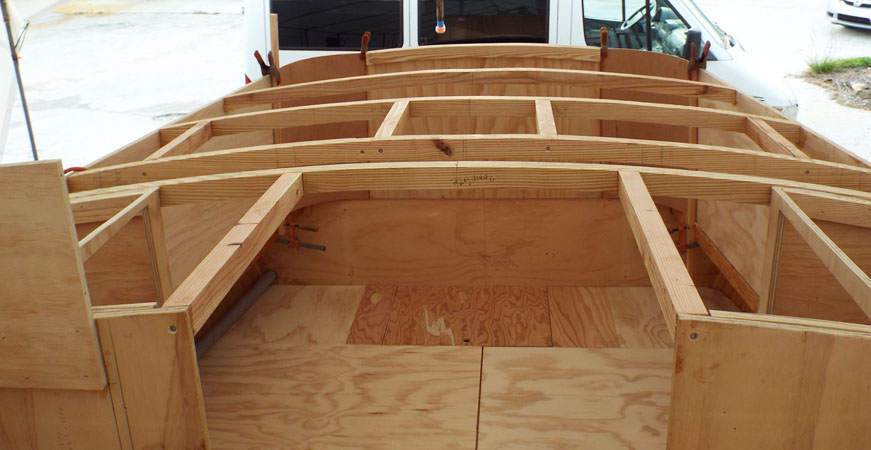
The strongback bolted to the asphalt, with diagonal braces and 2x4 stanchions for mounting bulkheads The bulkheads, lofted from the table of offsets, erected on the strongback--note 2x4 stiffeners
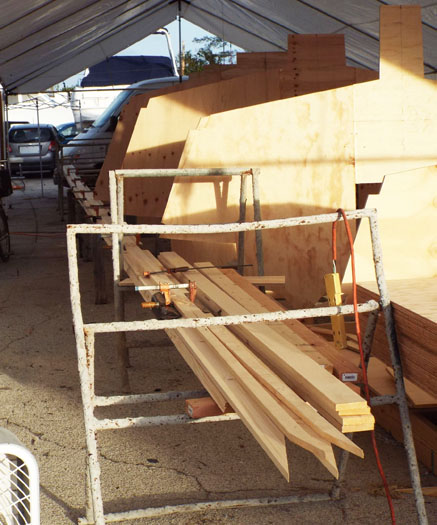
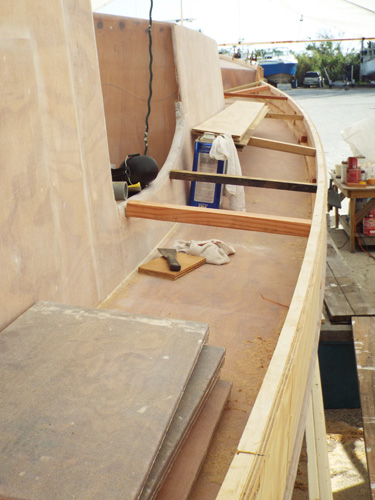
Longitudinals: sheer clamps, beam shelves and chine logs scarfed full-length Longitudinals in place, with the box keel started using 1" marine plywood
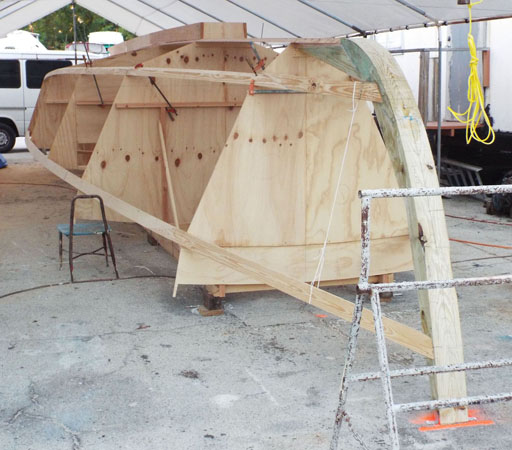
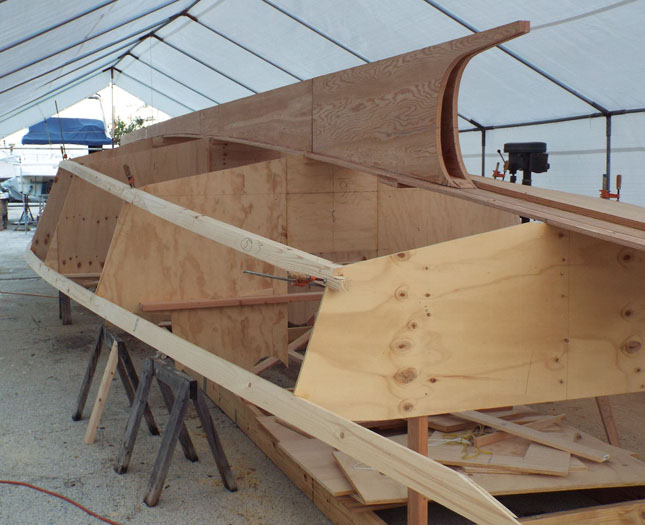
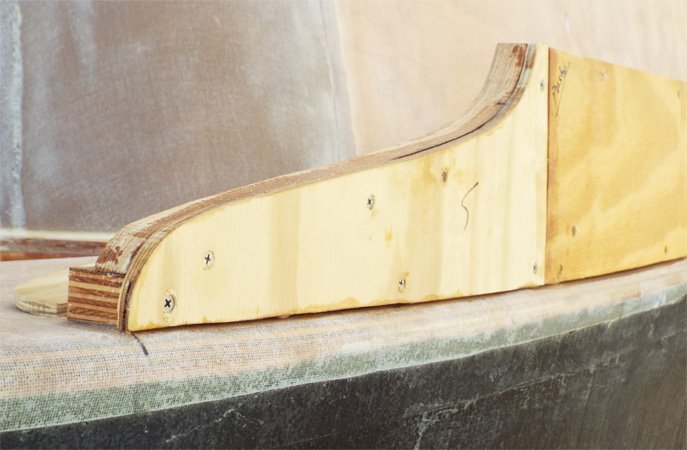
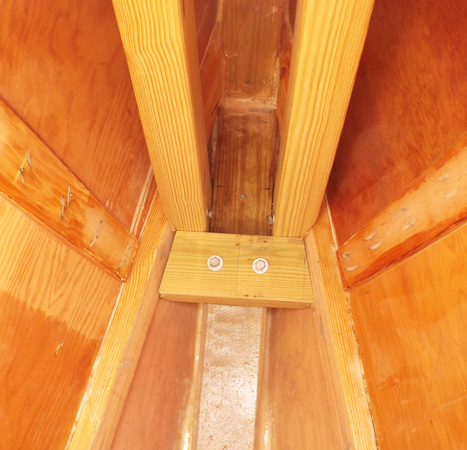
The apron/forefoot/knee assembly from 6x6 Wolmanized pine In place on the frame--beam shelves, sheer clamps and chine logs are installed--box keel started
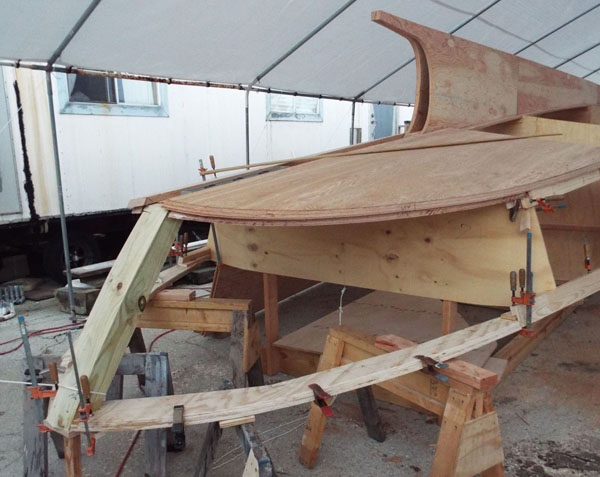

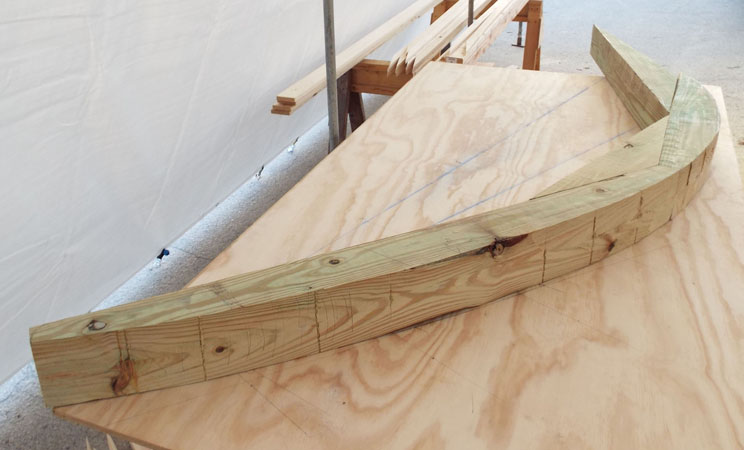
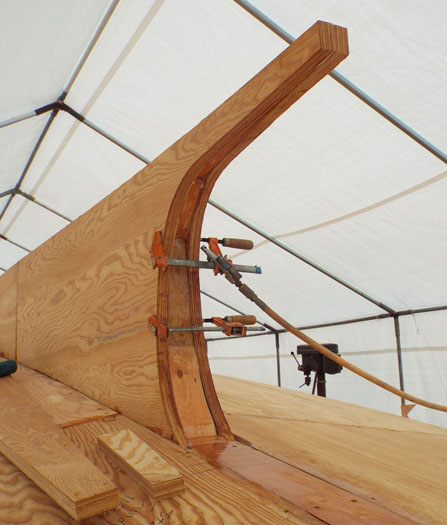
Forming the "flat-frame" structural members of the duck tail stern The rope leading left is holding the 6x6 stern post plumb while the epoxy cures

The duck tail stern planked from two layers of 3/8" marine plywood, scarfed into the 3/4" plywood topsides planking. Bottom planking is 1" marine plywood.
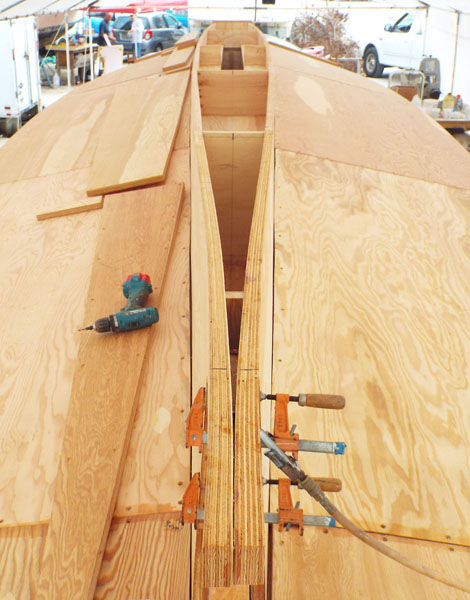
Planking the hollow box keel--filling in the propeller aperture (left); preparing to plank the bottom (right)
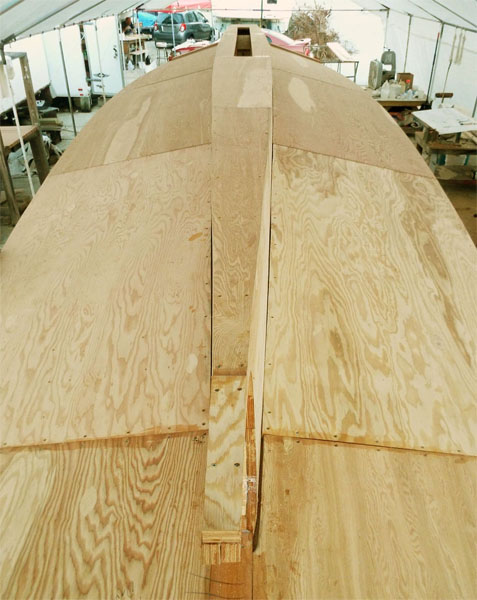
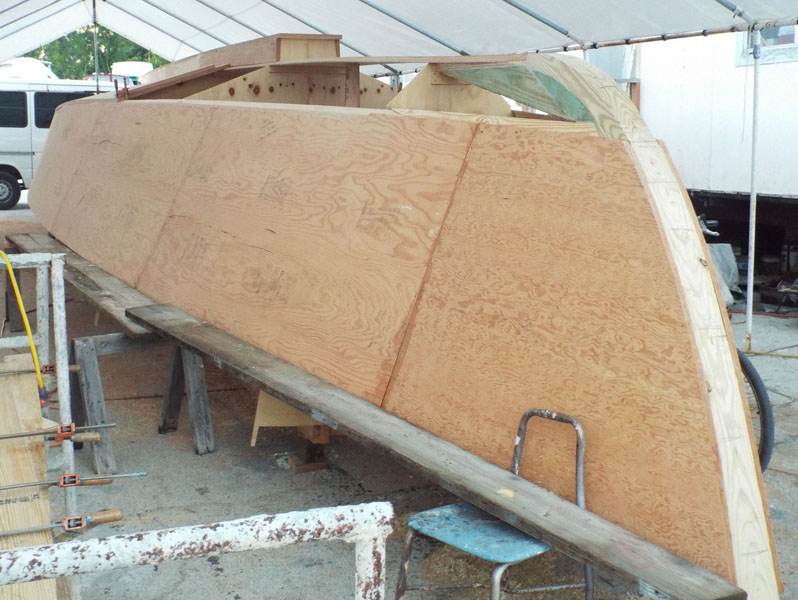
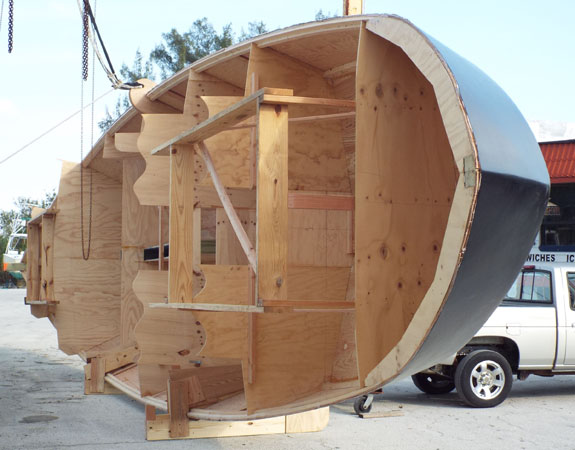
The box keel planked Topsides planking finished; bottom planking approaching the bow--due to twist, the remaining bottom planking consists of two laminates of 1/2" plywood

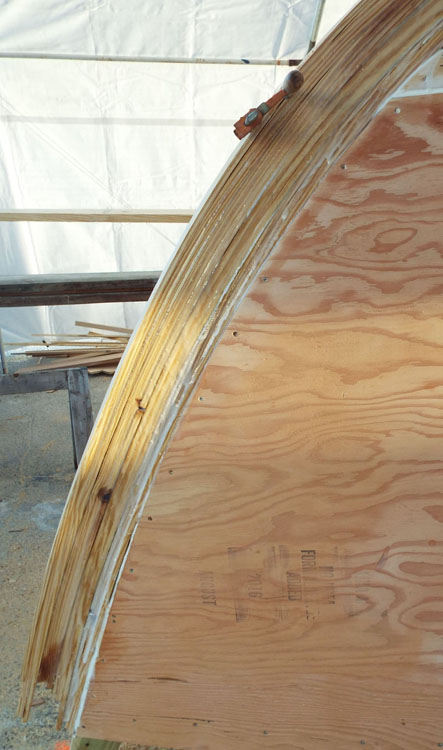
Planking finished; note the transition from overlap to butt joint along the chine Starting the outer stem laminations using 3/8" x 5 1/2" strips of yellow pine Finishing the outer stem--the bow structure is over 10" thick--very strong!

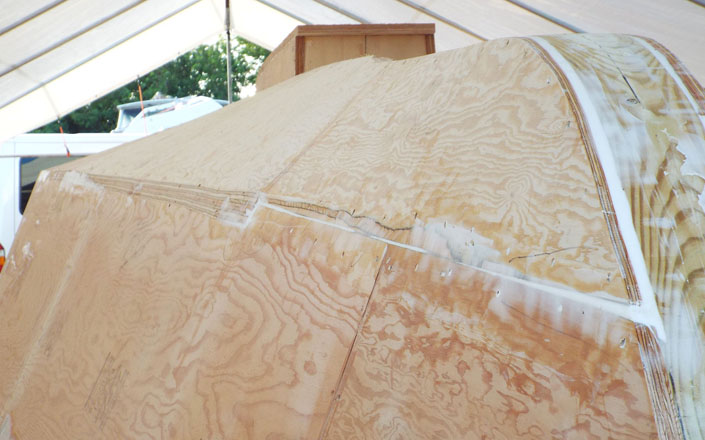
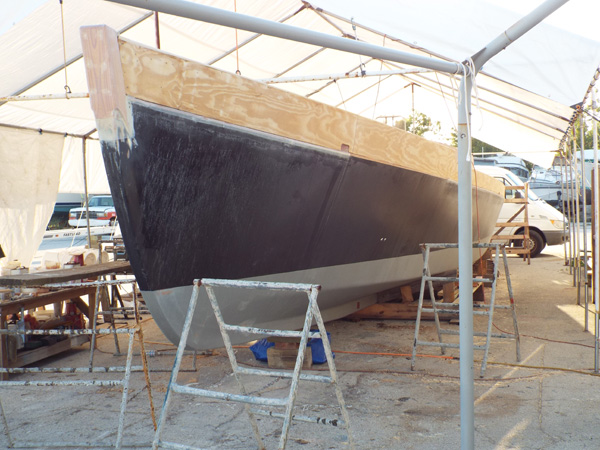
The finished hull, ready for Xynole-polyester fabric and epoxy; note the step scarf of outer stem to the solid yellow pine gripe keel; note taped and faired butt joints

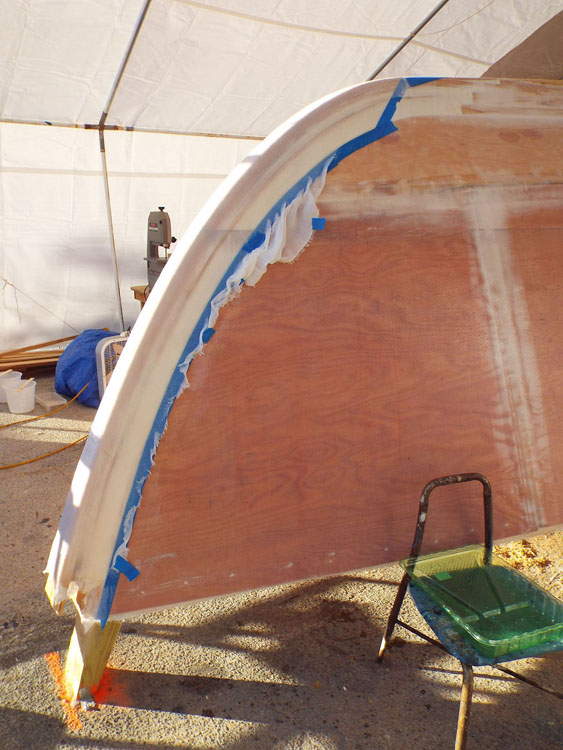
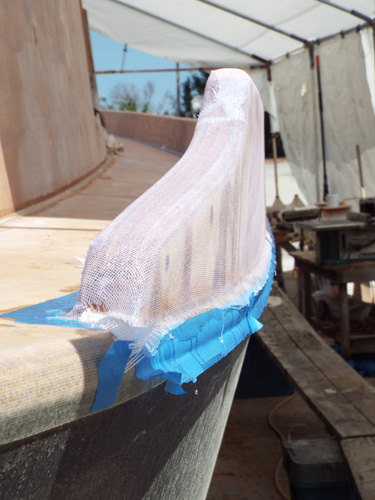
Xynole/epoxy covering the hull--the starboard side is finished, and the port side has just been wet out Layers overlap the keel and stem
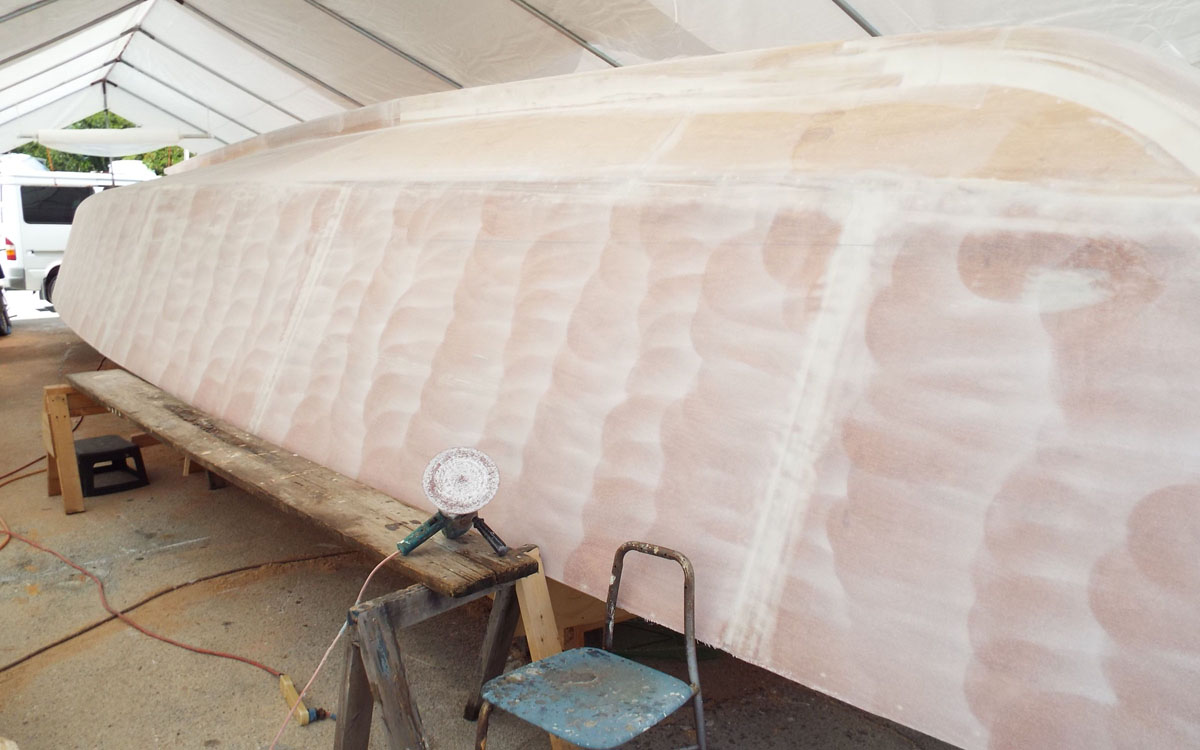
The first layer of Xynole/epoxy is finished, including two layers over the keel and stem, and the hull has been sanded to #60 grit using the low-speed Makita body grinder with thick 8" soft pad

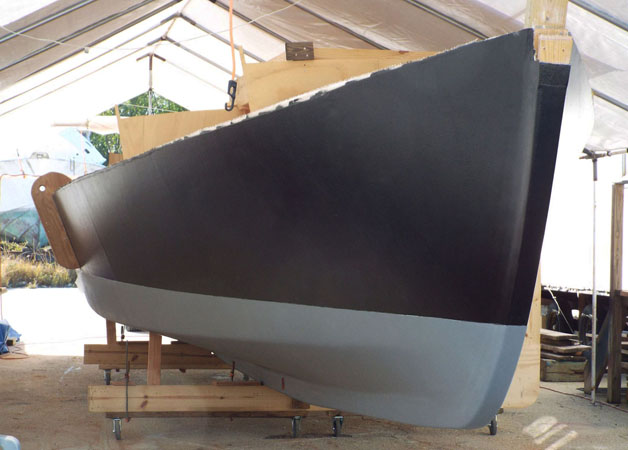
After cleaning the sanded hull, a second layer of Xynole/epoxy is laid below the boot top--eight layers are laid over the stem and keel

The sanded hull has been primed with high-build sandable epoxy primers (two coats), and turning wheels are built in place


The very strong lifting eye is located near the center of the hull Bill Smith is setting up the gantry's chain falls
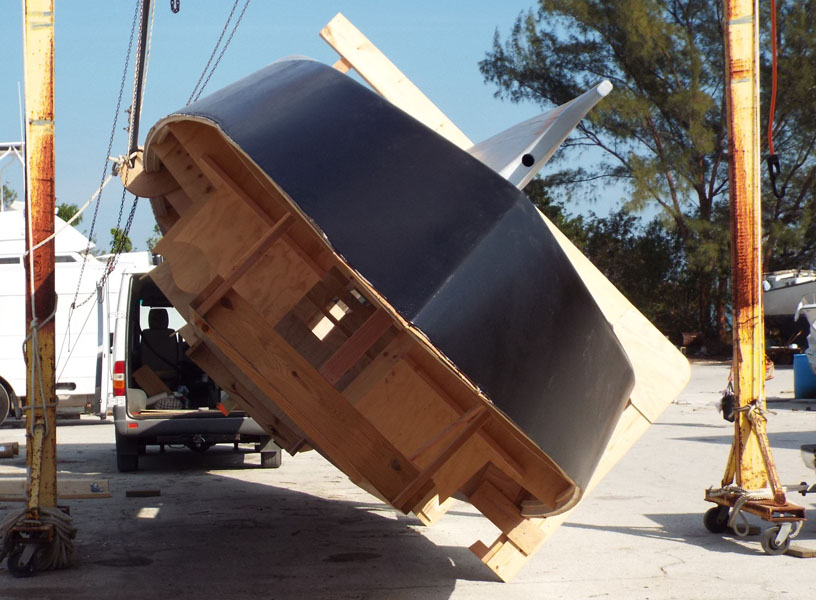
Starting the turn--we had to beef up the turning wheels in situ! Half way--the next part is tricky!
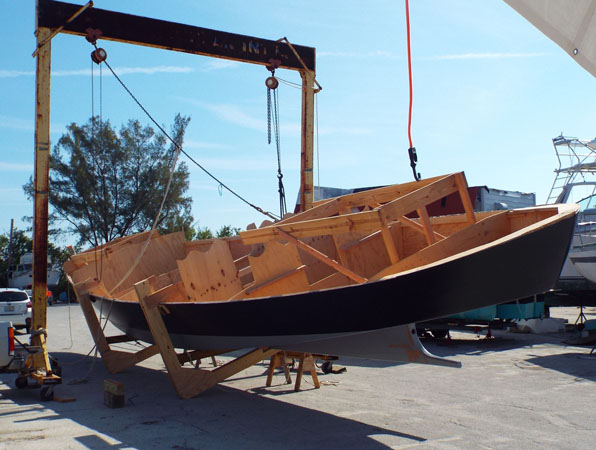
Almost! We used both chainfalls to control the drop--working at their upper limits! Right-side-up at last--back in the tent

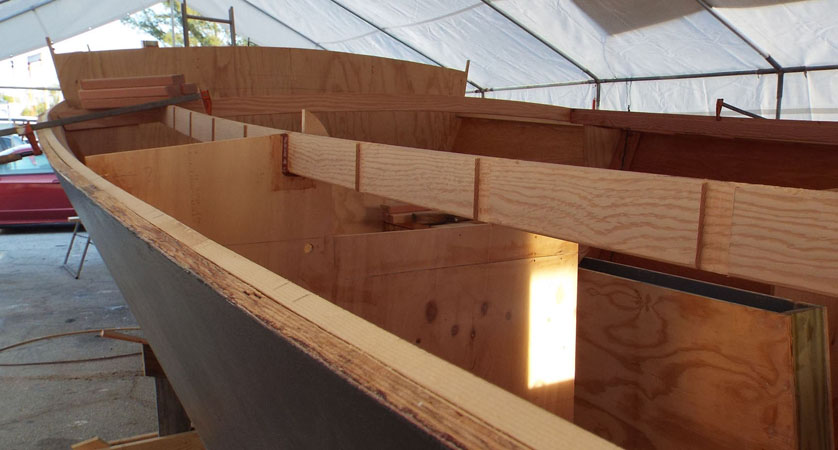
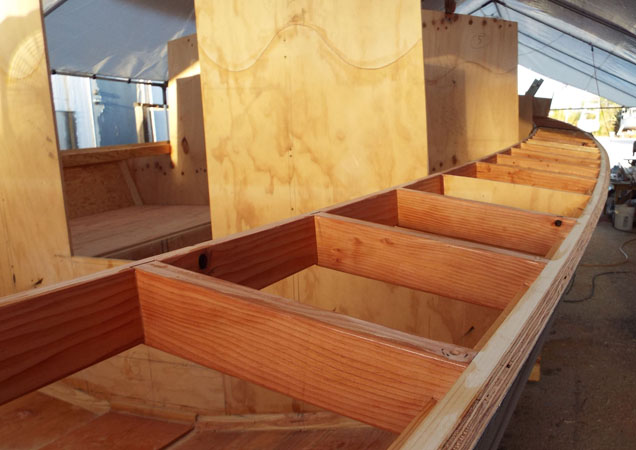
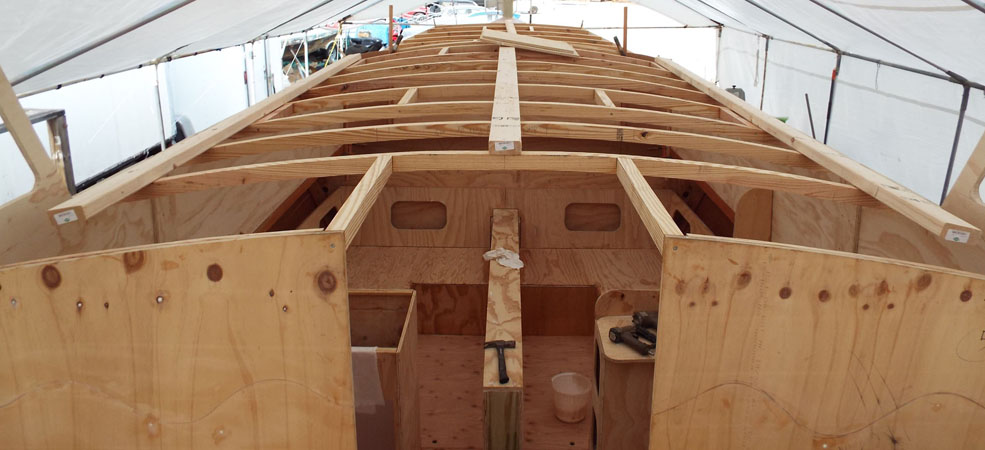
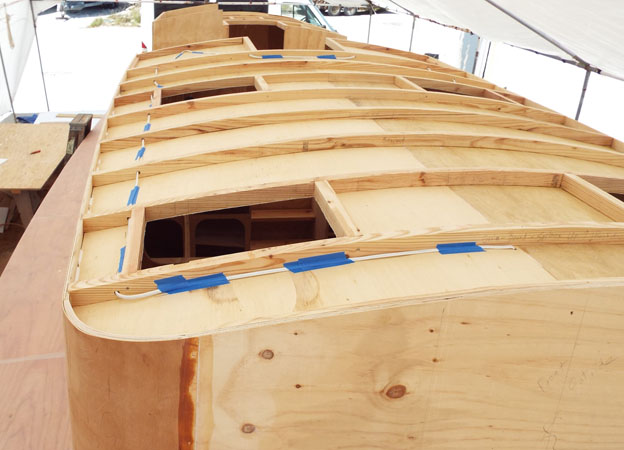
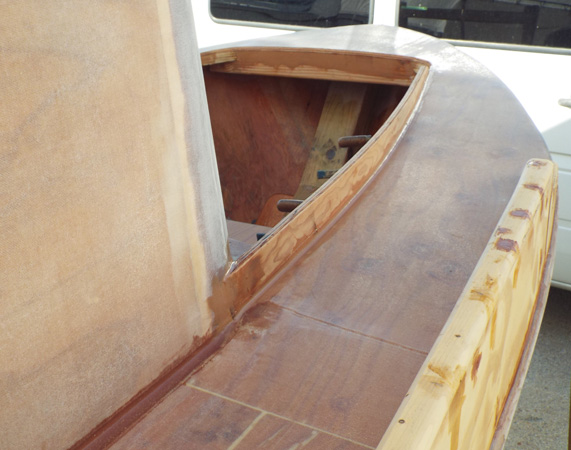
After removing strongback components and cleaning up the interior, I saturated it with penetrating epoxy and began installing deck structure A cabin trunk carlin with mortises for side deck beams glued and epoxy sealed
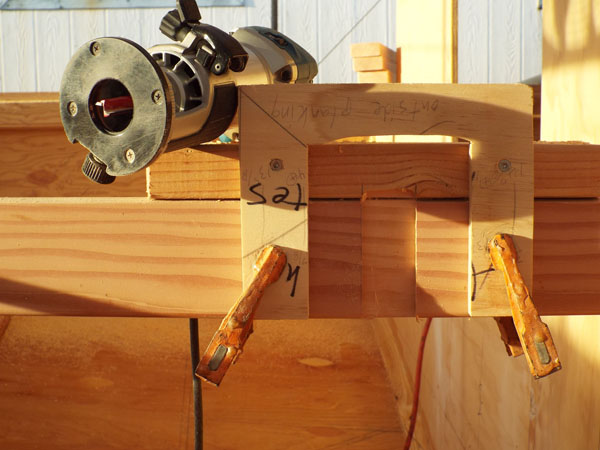
Using a router template for beam- and hatch carlin-end mortises Douglas fir side deck beams glued and sealed in place
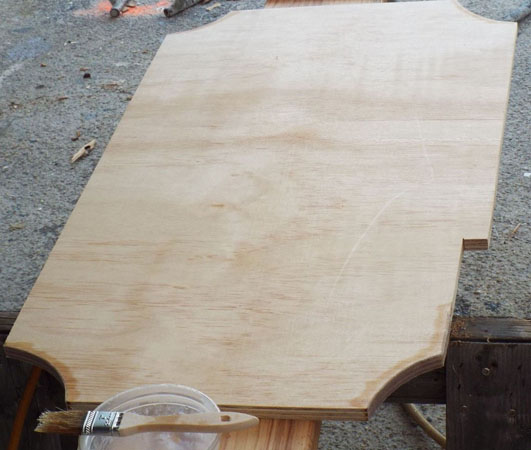

A fuel tank baffle being Xynole/epoxy covered, starting with the corners The port side fuel tank into which the baffle will be placed
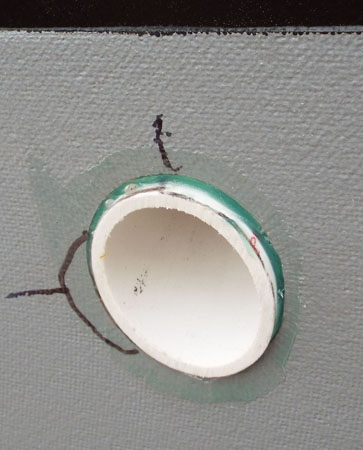
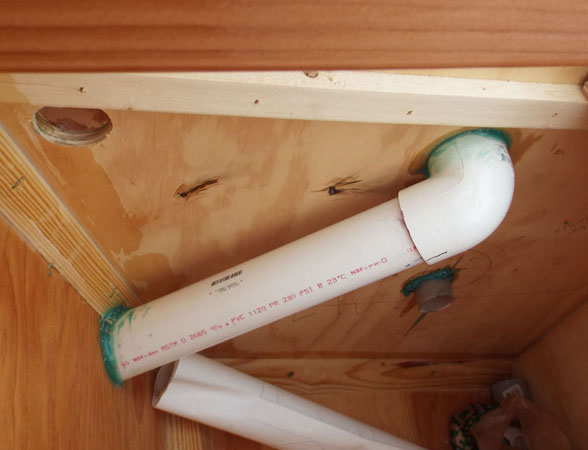
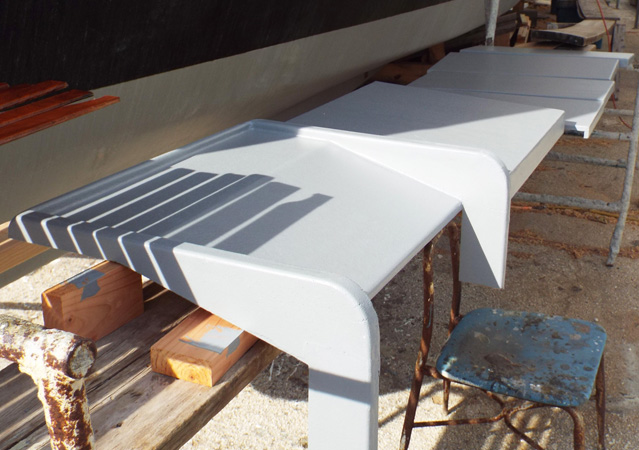
Cockpit well deck scupper--from outside (left) and inside (right); the hole (upper left) is for electrical conduit
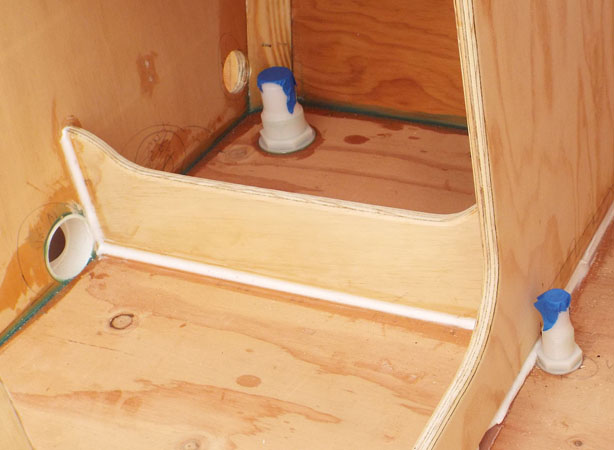
Cockpit well deck--scupper (left), fuel fill (top) & fuel tank vent (right) Cockpit showing 3" fiberglass scupper (left), and seat/locker over port fuel tank
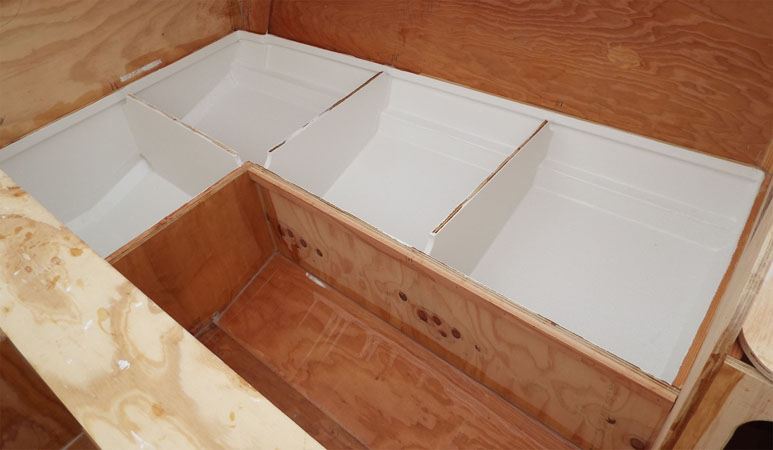
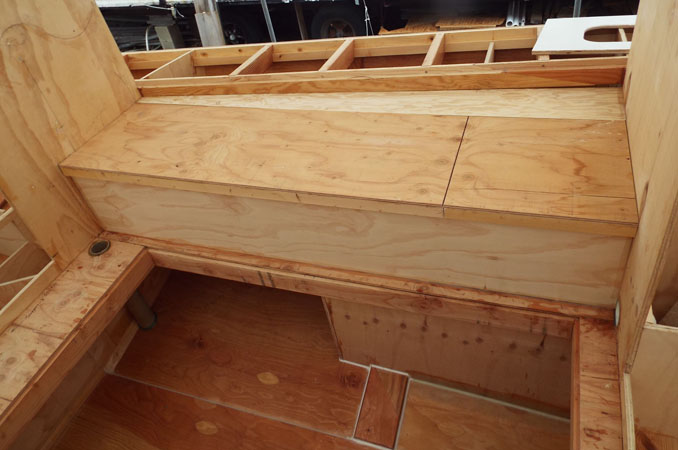
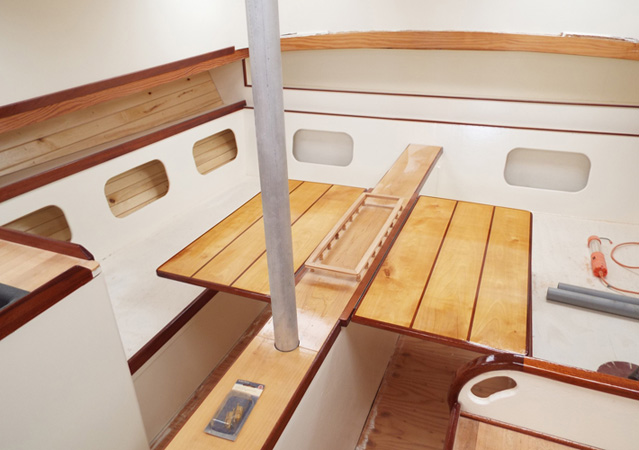
Starboard-side water tank with baffles, Xynole/epoxy covered and painted with epoxy potable-water tank coating Settees in the main saloon built over the water tanks--centerboard trunk between

The main companionway steps from the cockpit The cockpit--holding tank and shower well (upper left); starboard fuel tank (lower left); engine compartment (right)

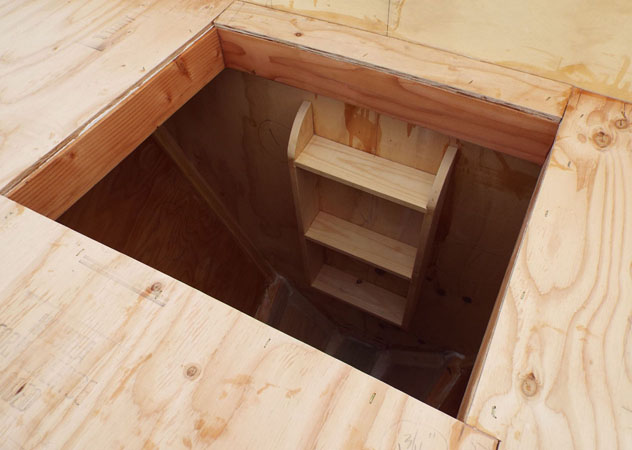
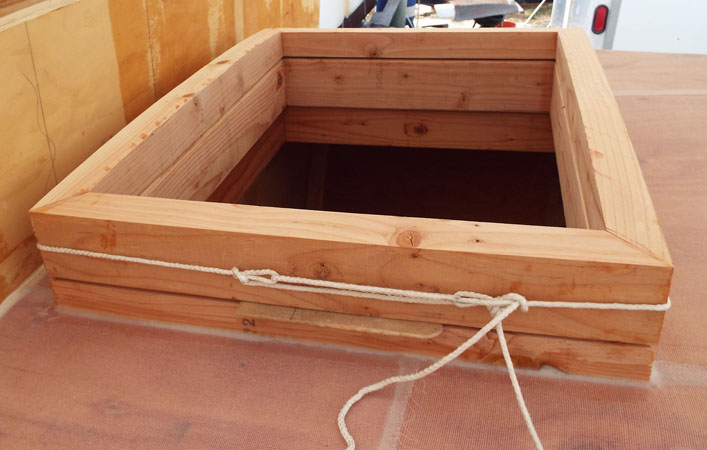
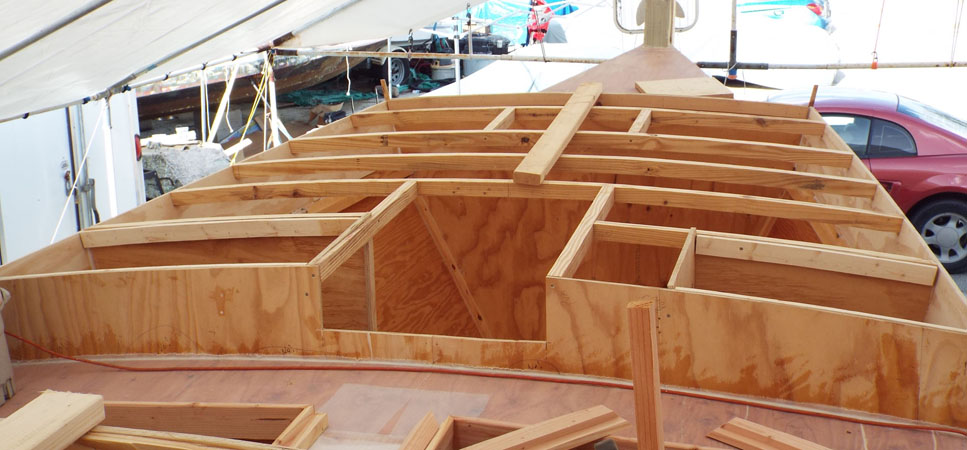
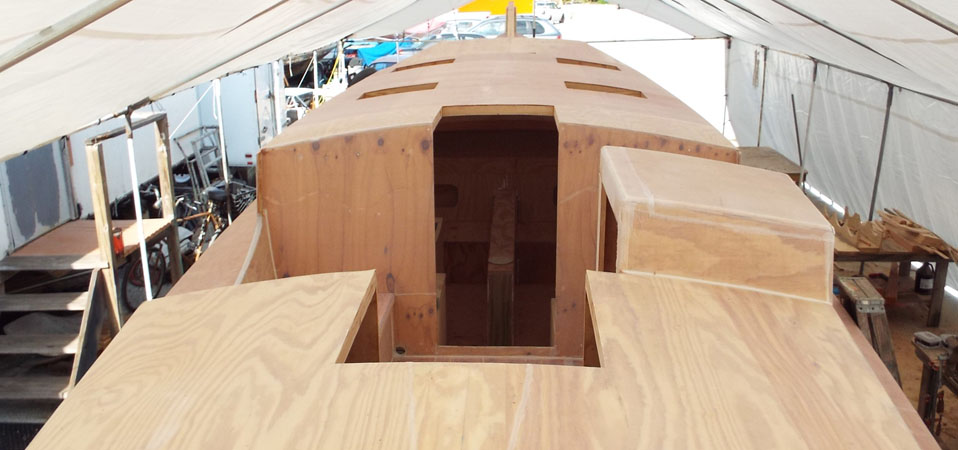
The fore deck and forepeak hatch opening Fore peak (chain & rode locker) and access ladder
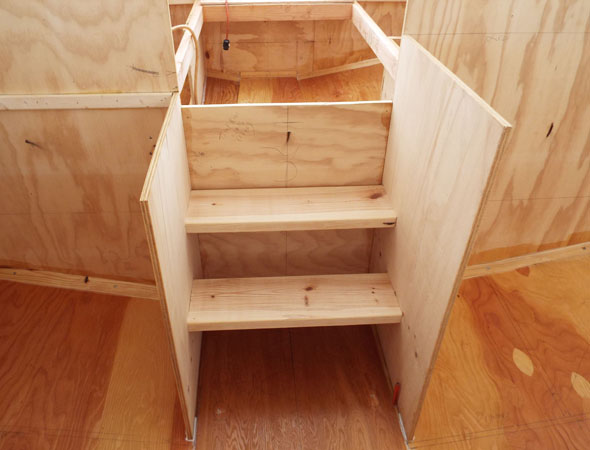
The forepeak hatch coamings and hatch frame glued in place The foc's'le ladder and cabinets roughed in
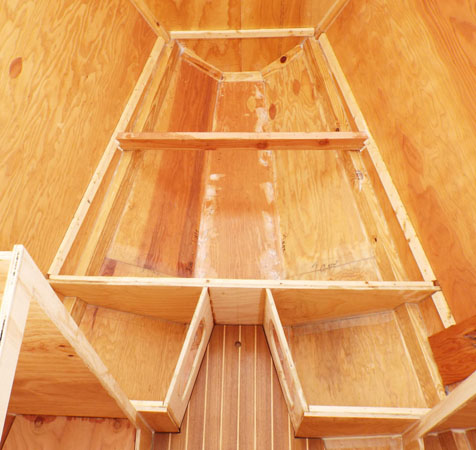
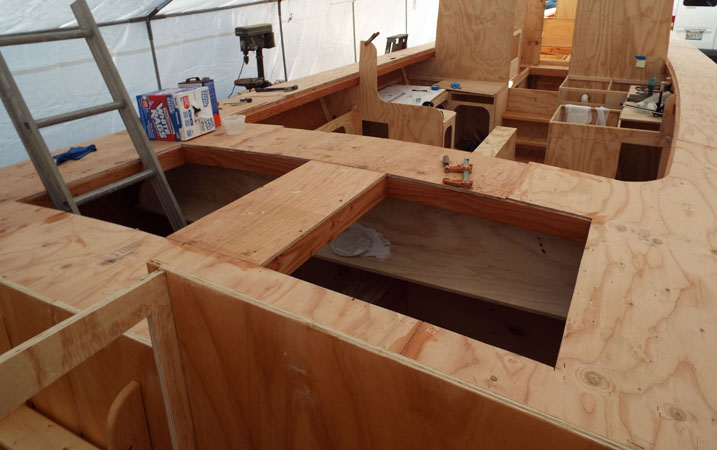
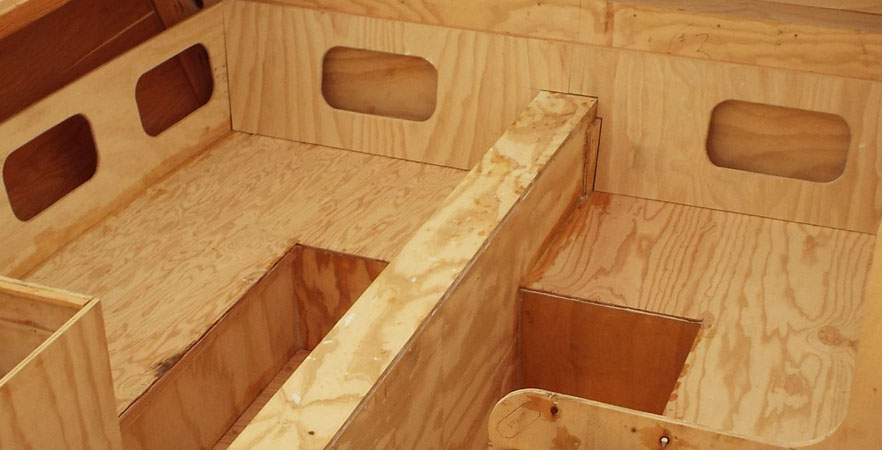
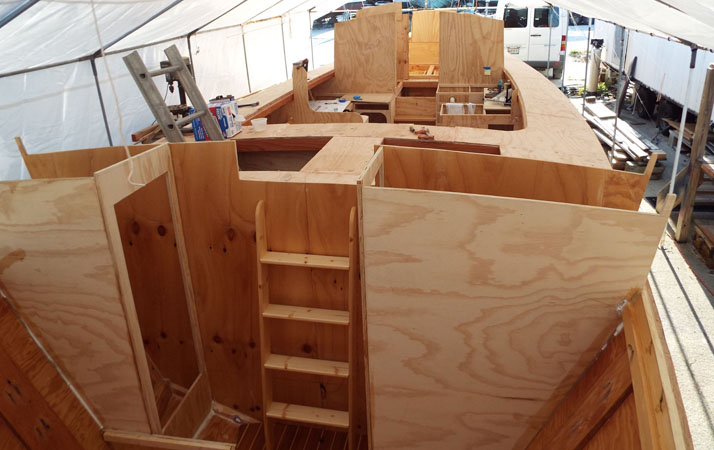
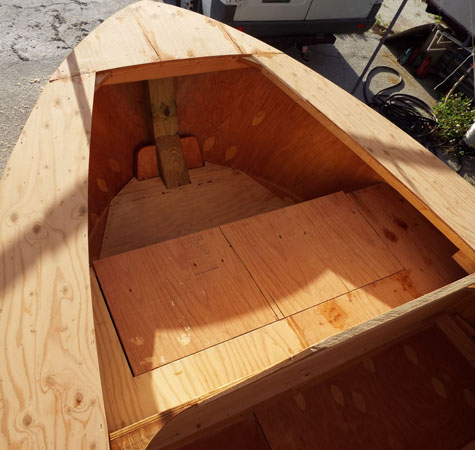
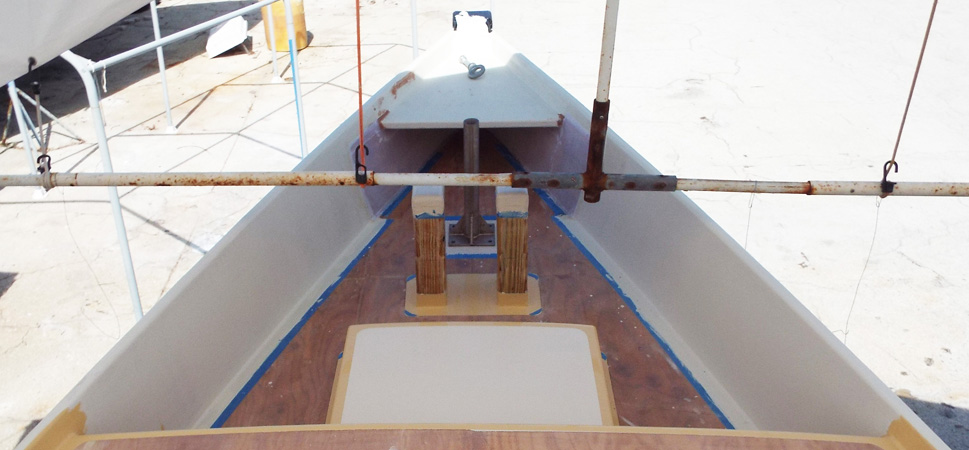
The foc's'le V-berth framed with removable cabin sole The cargo hold hatch openings
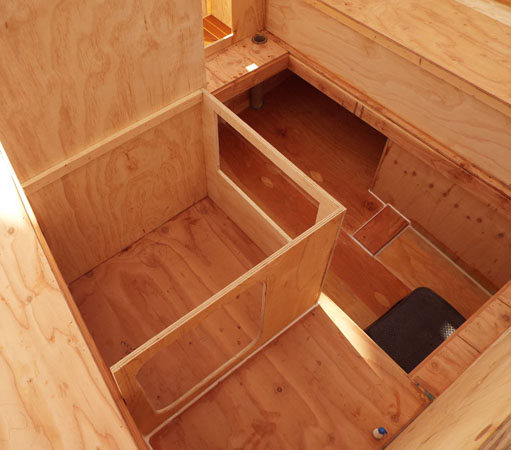
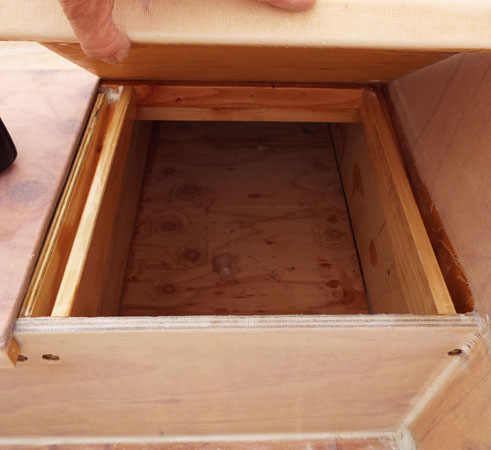
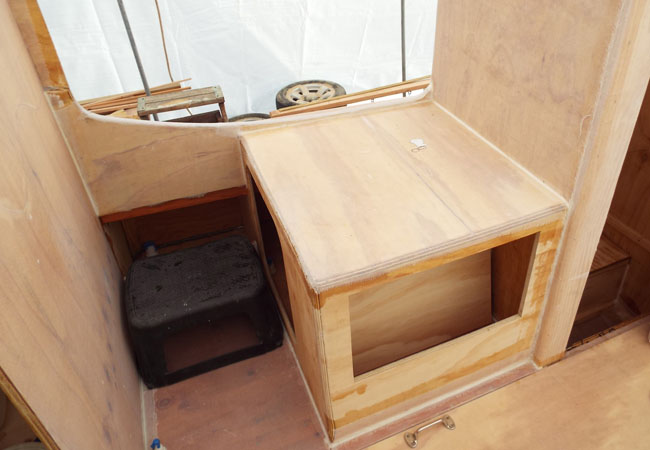
The cockpit/pilothouse: starboard helm seat/locker (left); engine compartment and port seat locker (right) Forward port seat locker open showing drain channels

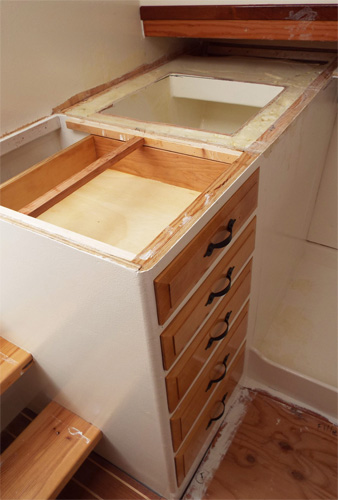
The aft sleeping cabin showing hanging lockers, drawer boxes and removable cabin sole The aft cockpit showing bench seat/locker
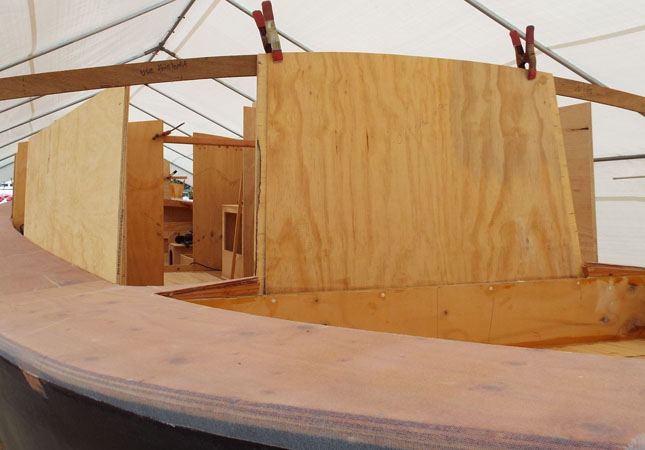
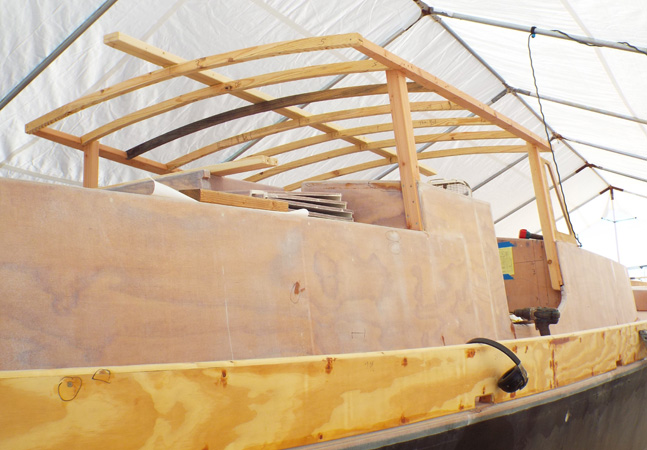
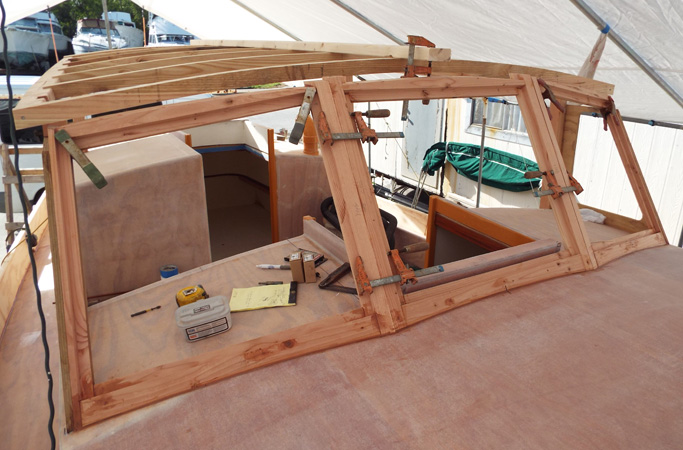
Using the coachroof beam template to cut the tops of cabin ends; decks covered with Xynole/epoxy Starting the coachroof frame for the main saloon (note 2x4 stiffener)
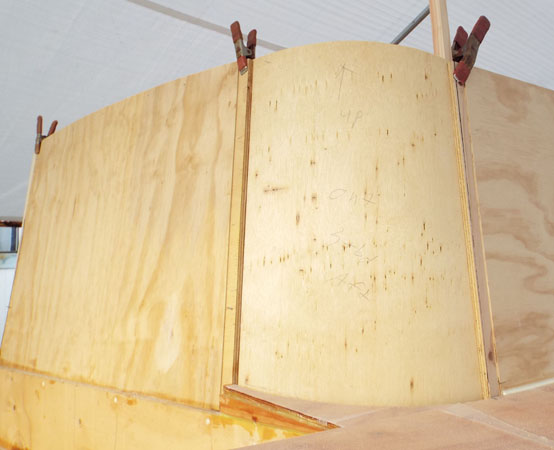
A first laminate for a cabin corner using 3mm Meranti plywood The aft cabin coachroof frame, with rounded corners aft
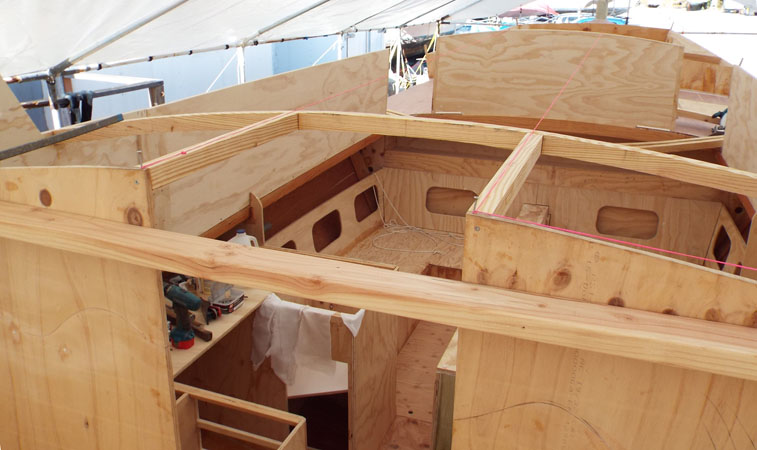
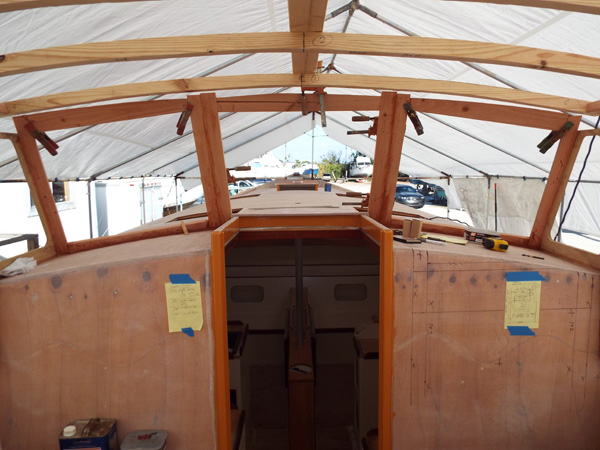
The main saloon coachroof in frame--the 2x4s on top hold the beams in alignment while the headliner is installed
The raised fore deck over the foc's'le--beams here are 2" high (coachroof beams are 1 3/4" high), and crown is the same as for the decks
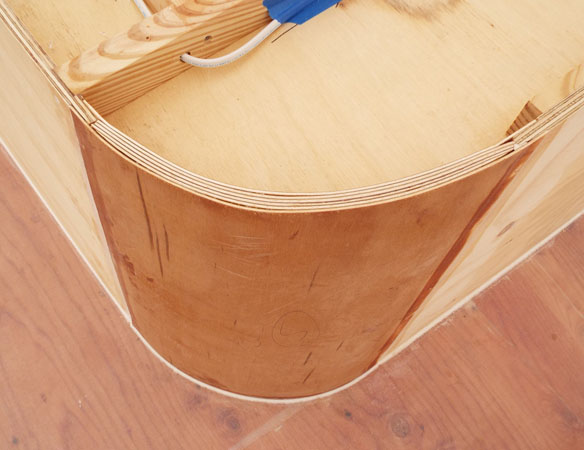
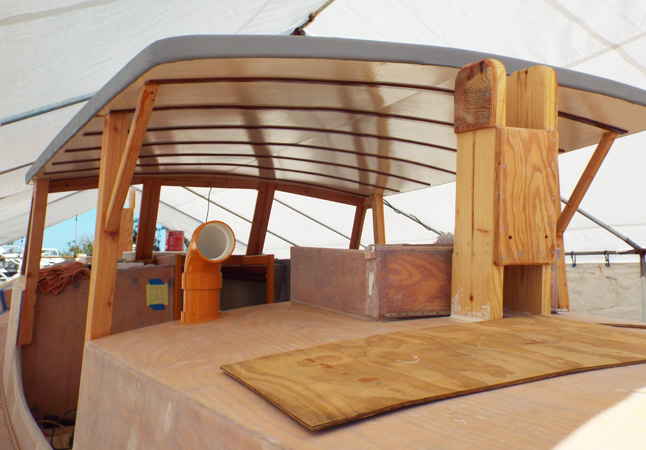
A cabin trunk corner laminated from six layers of Meranti plywood Headliner installed for the main saloon--pre-wired for overhead lights

The cockpit/pilothouse showing the port side seat/locker and engine hatch; coamings are doubled in thickness The Cockpit helm seat on the starboard side; propane bottles under outboard; tool box inboard
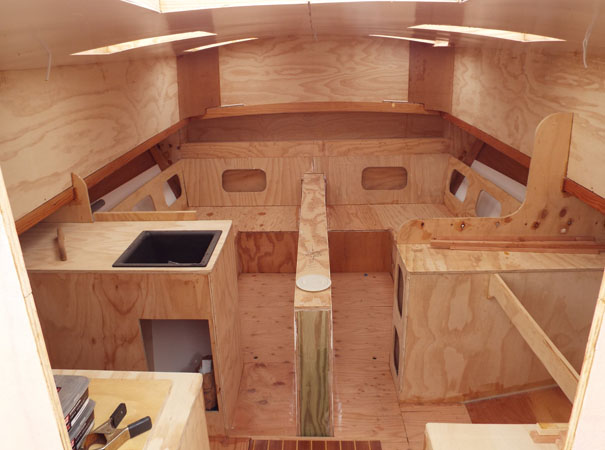
The main saloon with pre-painted headliner installed--Galley to port, office to starboard, settees forward View forward from the aft cabin coachroof--the outside head/shower compartment is to starboard--all Xynole/epoxy covered

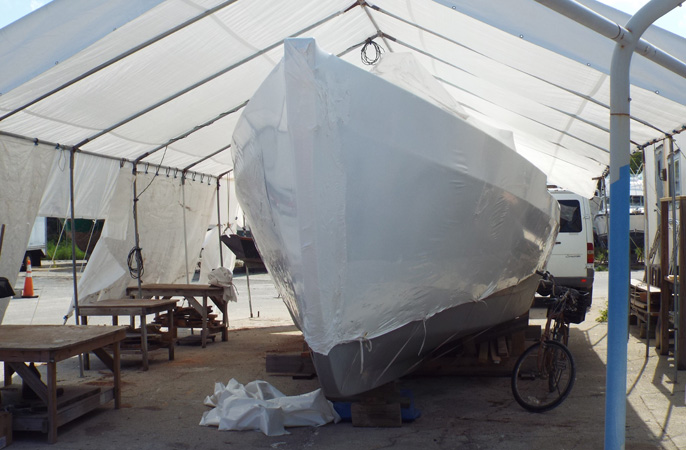
Early May, 2017 -- The structurally complete boat is shrink-wrapped for the brutal south Florida summer; labor time was 24 1/2 weeks, and materials costs were just under $16,000
* * * * *
I returned to Riverside Marina on
Sunday, October 22, 2017. My shrink-wrap cover
had been blown off the boat numerous times, and my boatbuilding partner
Bill
Smith had replaced it as best as possible. He had to pump a lot of
water out of
the hull, and added plywood covers where necessary.
Then Hurricane
Irma
arrived.
When I opened up the boat,
removing the tattered shrink-wrap
and Bill’s plywood, I found water inside numerous compartments. The
engine room
was completely flooded, containing perhaps 100 gallons of water. There
was
extensive mold everywhere, and damp plywood under the water in places
even though
everything had been sealed with penetrating epoxy. I used my shop-vac
to
suck out most of the water, but I had to use a transfer pump to start a
siphon in
the engine compartment. It took over an hour to drain.
My financial situation at this
stage of my life was a
disaster. I was completely broke, and running into debt—I had to borrow
thousands of dollars just to keep going. I had two options: One—get a
reverse
mortgage and establish a line of credit so I could keep building;
Two—try to
limp through the
winter with
rent money (I had tenants moving into my house on
December 1st. ). Fortunately, I also had some boatyard work
lined up.
It turned out that my income is so pathetic that I don’t qualify for a
reverse
mortgage, so that option dropped out.
During my previous summer in Maine,
taking advantage of my barn
and all my industrial milling tools, I had pre-made all of my
trim—deckbeam
covers, fiddle rails, seam trim, bunk boards, hatch coaming trim, etc
from a
very large Honduras mahogany timber I had in stock. I milled rock
(sugar)
maple
for my countertops, yellow birch for my centerboard cap, cabinet doors
and
saloon drop-leaf tables, and miles of big-tooth poplar (pure light tan)
for my
ceiling planking. All but the mahogany came from my own trees.


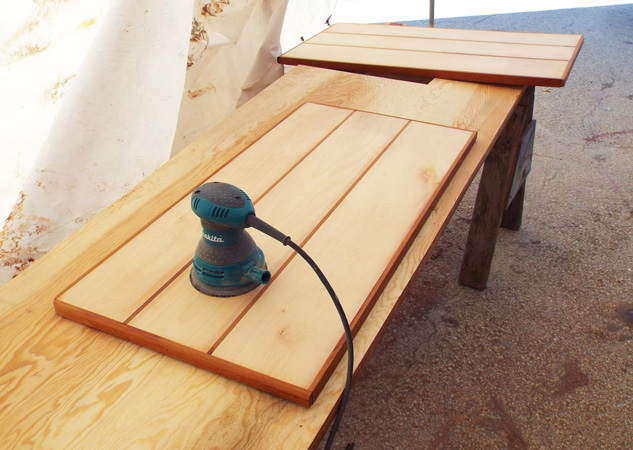
Mahogany trim, epoxy sealed and varnished, ready to be installed in my
interior
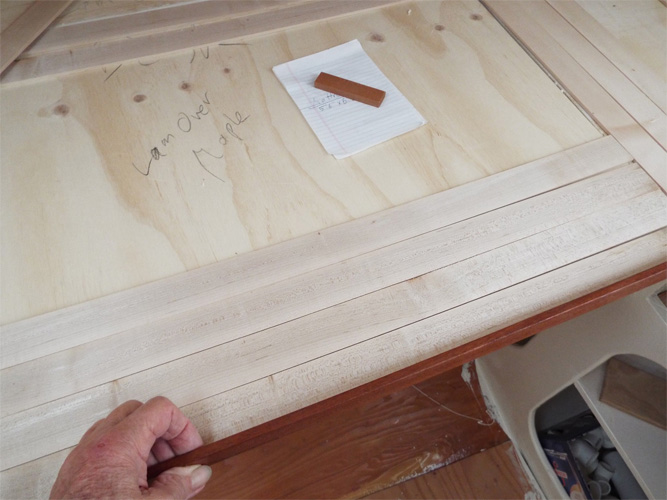
I laminated rock maple on all my counter
tops
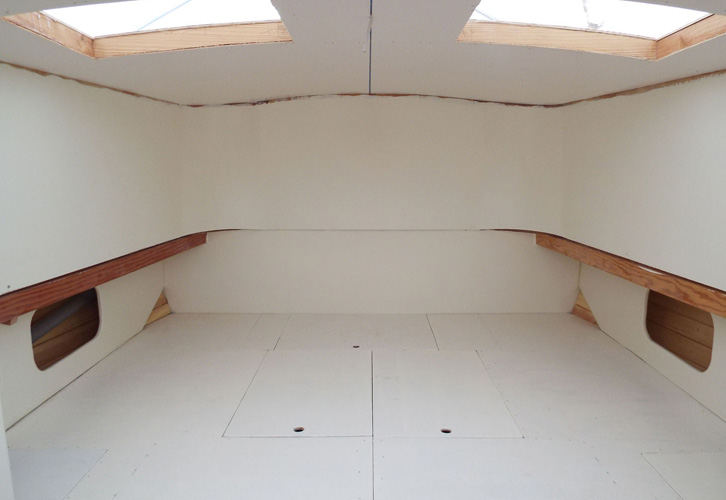
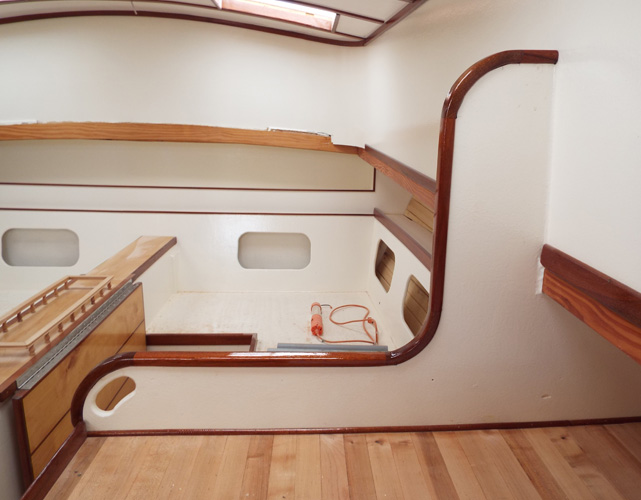
The aft sleeping cabin (master's cabin) roughed in; The aftermost
removable panel accesses the steering gear


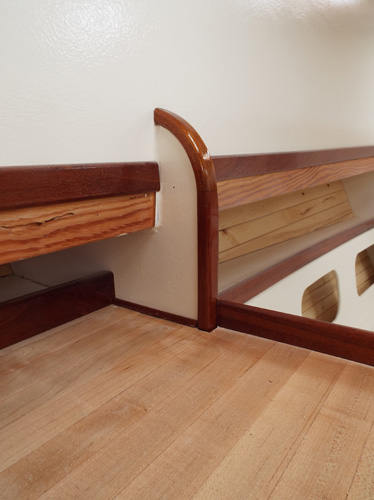
More mahogany trim--bunk boards, fiddle rails, coachroof beam caps, etc
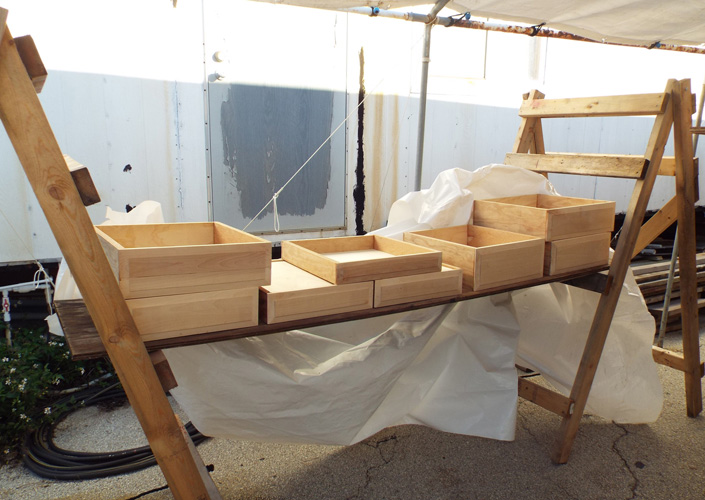
Drawers with beveled yellow birch faces
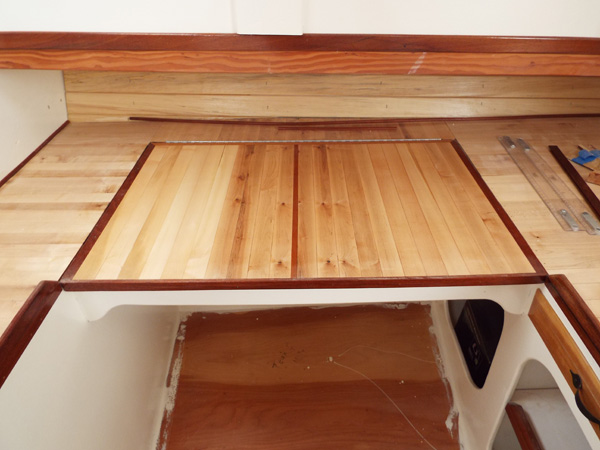
The drop leaf tables, made from yellow birch and mahogany


Using a heat gun to bend mahogany corner trim

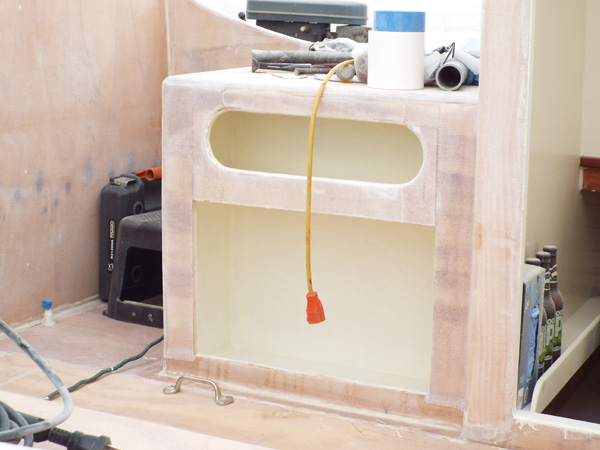
Pouring the closed-cell polyurethane foam for the refrigeration compartment The mess trimmed (using a machete); Galley drawers in place
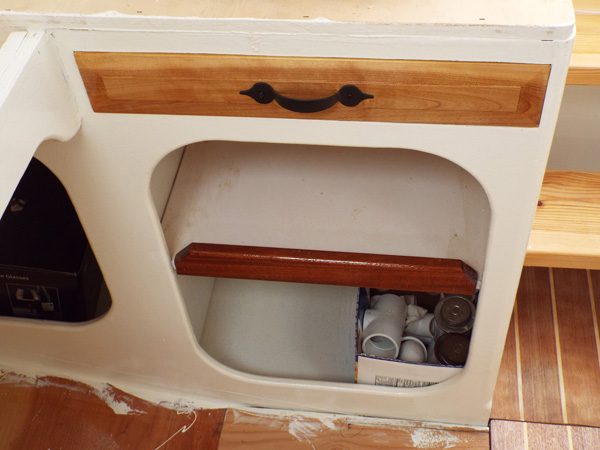
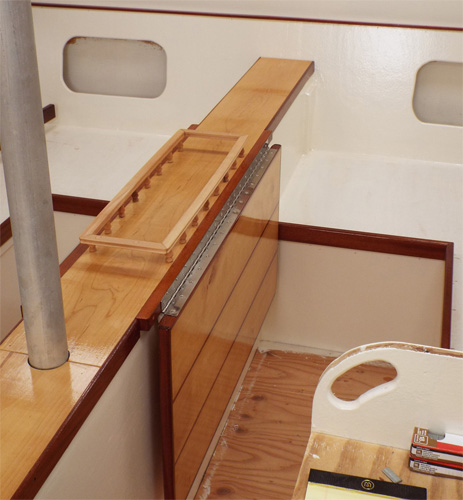
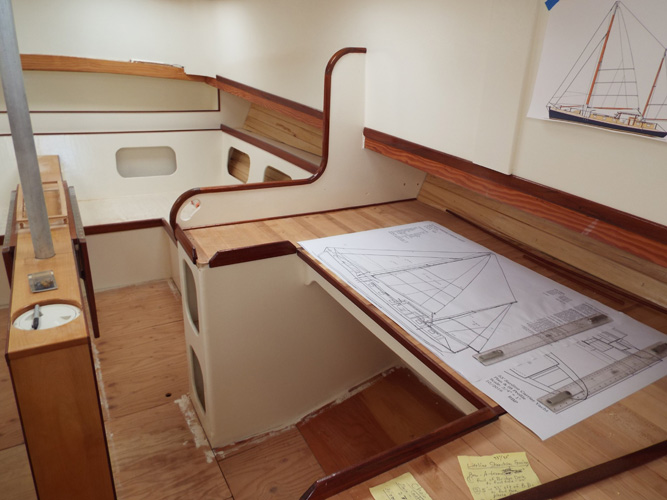
The office drawer and cabinet The centerboard cap with drop leaf tables; the pipe is for the centerboard penant
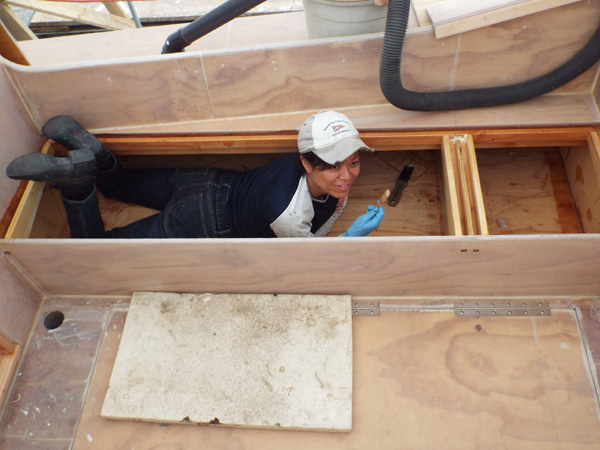
The Nav desk, hinged to access space beneath for drafting & nav tools My brief helper (six days) Chure filleting compartments too large for me to get into
Cockpit helm seat locker--my mechanic's tool box will be installed on tracks in the lower opening Companionway to the saloon

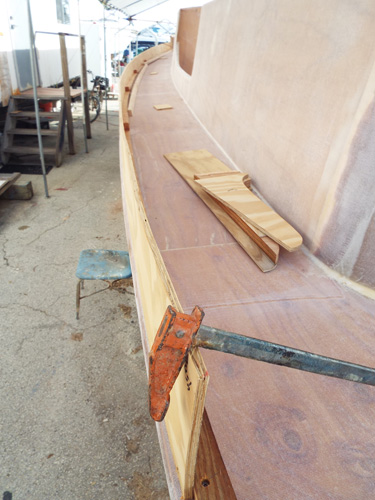
Starting the A-frame bulwarks--the solid wood base--note the "bridges" for the scuppers Bulwarks--the outer laminate of 3/8" plywood installed
Installing the upper bulwark cleat The aft end of the starboard bulwark


The bulwark where it rises proceeding forward to enclose the raised foc's'le deck The bulwarks at the bow prior to installing the inner laminates
The inner bulwark laminate installed and the solid cap started The inner laminate installed around a shelf of 1" marine ply to support the windlass
The bulwarks finished from outside (forward) The bulwarks aft; The aft cockpit coamings being installed
The pilothouse hardtop in frame; Bulwarks ready for Xynole/epoxy The windscreen in frame

The pilothouse in frame from the front The foam-core hardtop structurally complete, ready for Xynole/epoxy; The small stock by the windows is for the opening window frames
The Hardtop in primer, with mahogany deckbeam trim; The mizzen tabernacle Helm console and hatch covers in primer

The aft cockpit and seat locker The starboard bulwark end, Xynole/epoxy covered
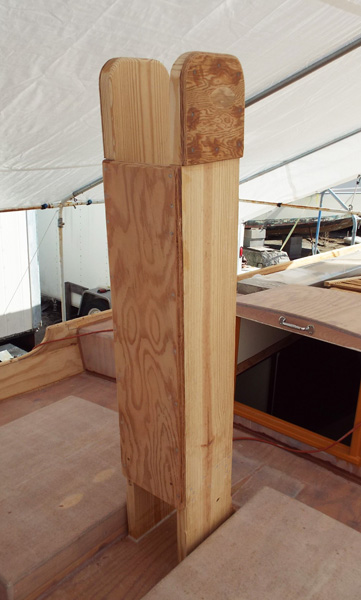

The mainmast tabernacle (two views)

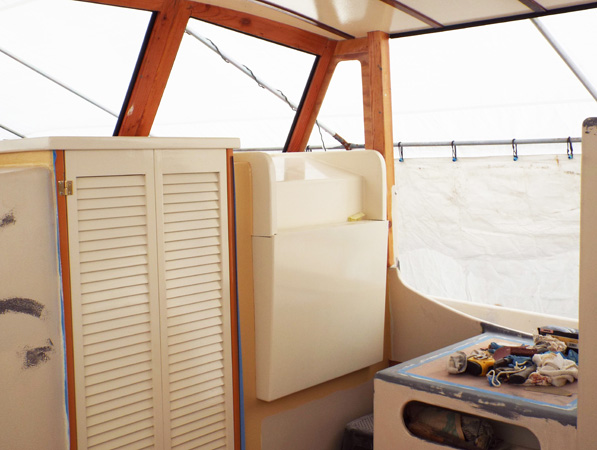
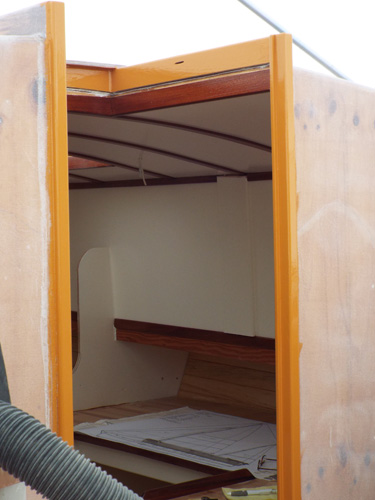
Louvred companionway doors under construction Doors and bi-fold hatch cover installed for the saloon companionway; Helm station installed
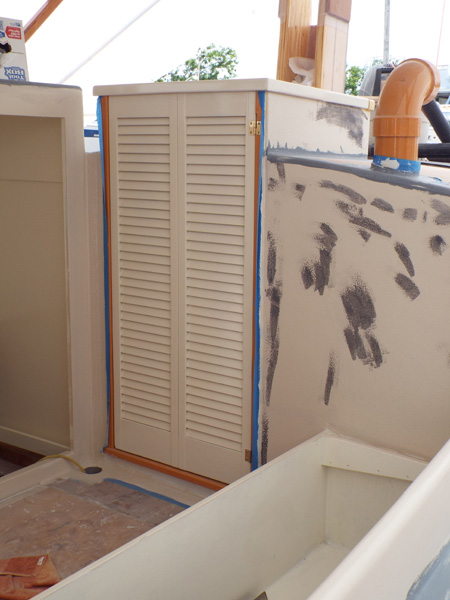
The hardtop painted and trimmed; The black perimeter channels are for vinyl side/back curtains to enclose the pilothouse Companionway doors and bi-fold hatch cover for the aft cabin
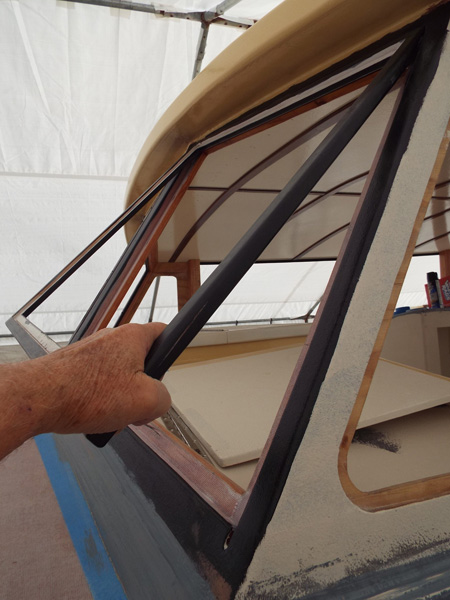
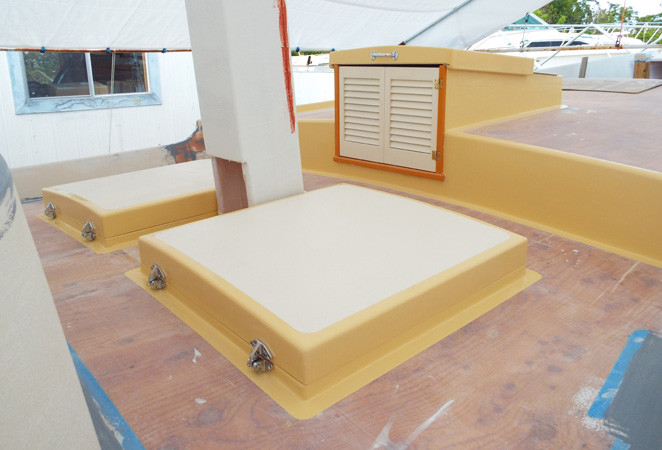
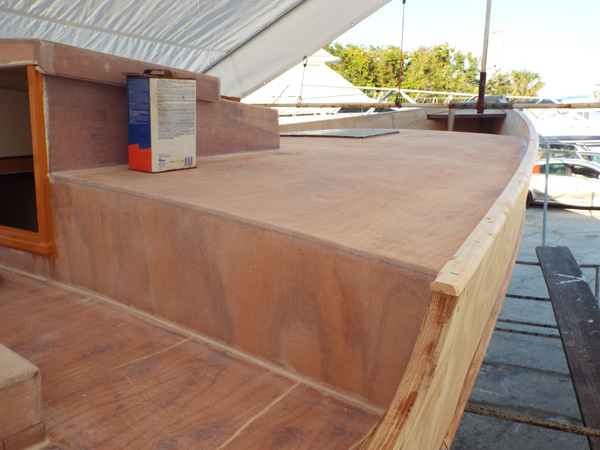
The opening window frames in primer The bridge deck with painted cargo-hold hatches and focsle companionway
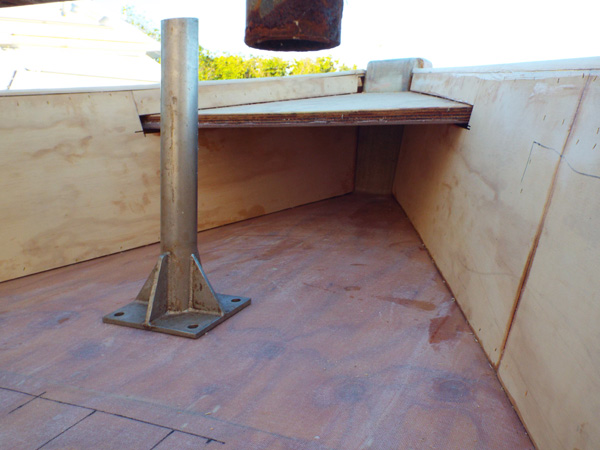
The well deck forward; Forepeak hatch, Mooring bitts; Stays'l boom pedestal; Windlass shelf Mooring bitts stepped & bolted to the chine logs

The refrigerator lid Galley trim
The saloon--view forward from the nav station (starboard) The nav station/office (starboard)
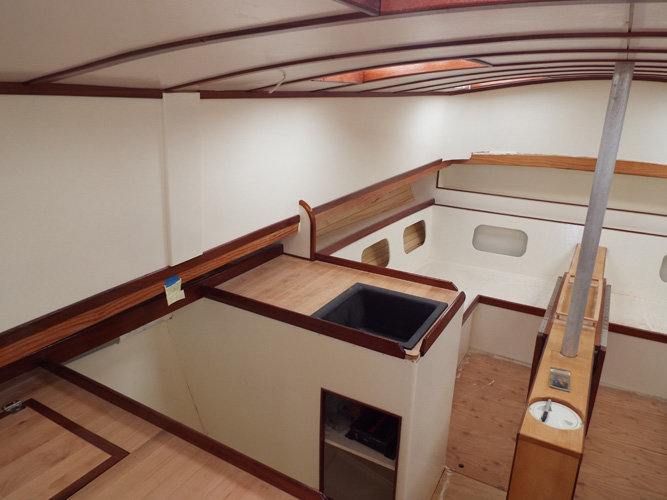
The saloon--view forward from the galley (port) The saloon--drop-leaf tables open; I installed 3/4" foam insulation behind the poplar ceiling planking
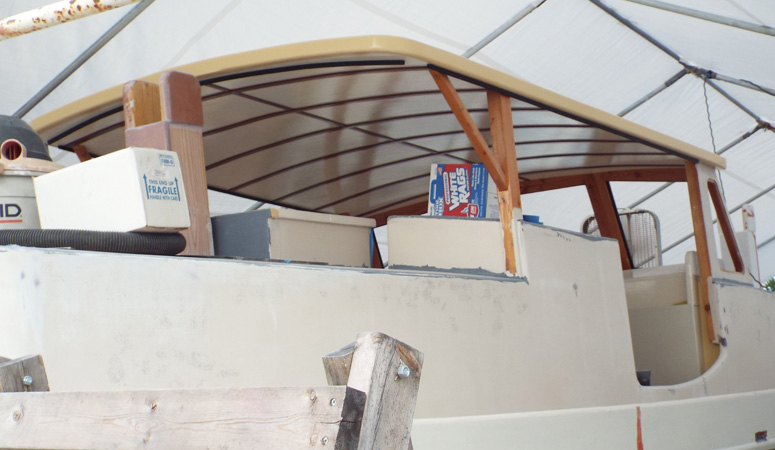
The structurally complete boat in primer The boat shrinkwrapped for the 2018 summer season (much more carefully than last time!)
Time elapsed was six months, and total expenses were $8,500. Total work time elapsed was now one year, and total expenses were now $24,500.
Labor is more difficult to pin down, as I didn’t record my hours. But it is safe to estimate my labor for these first two six-month work periods to be over $100,000, for more than 2,000 hours. Unlike most people, I work seven days a week… until I set sail!
“You got to have a dream…
if you don’t have a dream…
how you gonna have a dream come true.”
—Bloody Mary, in South Pacific, by Rodgers and Hammerstein